Microsoft email account setup
Since Microsoft deprecating the Basic Auth flow. We will not be able to send/receive outlook emails in our email channel inbox with basic authentication, now we will need to implement the Oauth2.0 flow and get the access tokens from the Azure app. To implement this in your self-hosted version follow the below steps.
Register An Azure App
To add email channel inbox for outlook email, you have to create azure app in the Microsoft Azure portal. You can find more details about creating Azure App here.
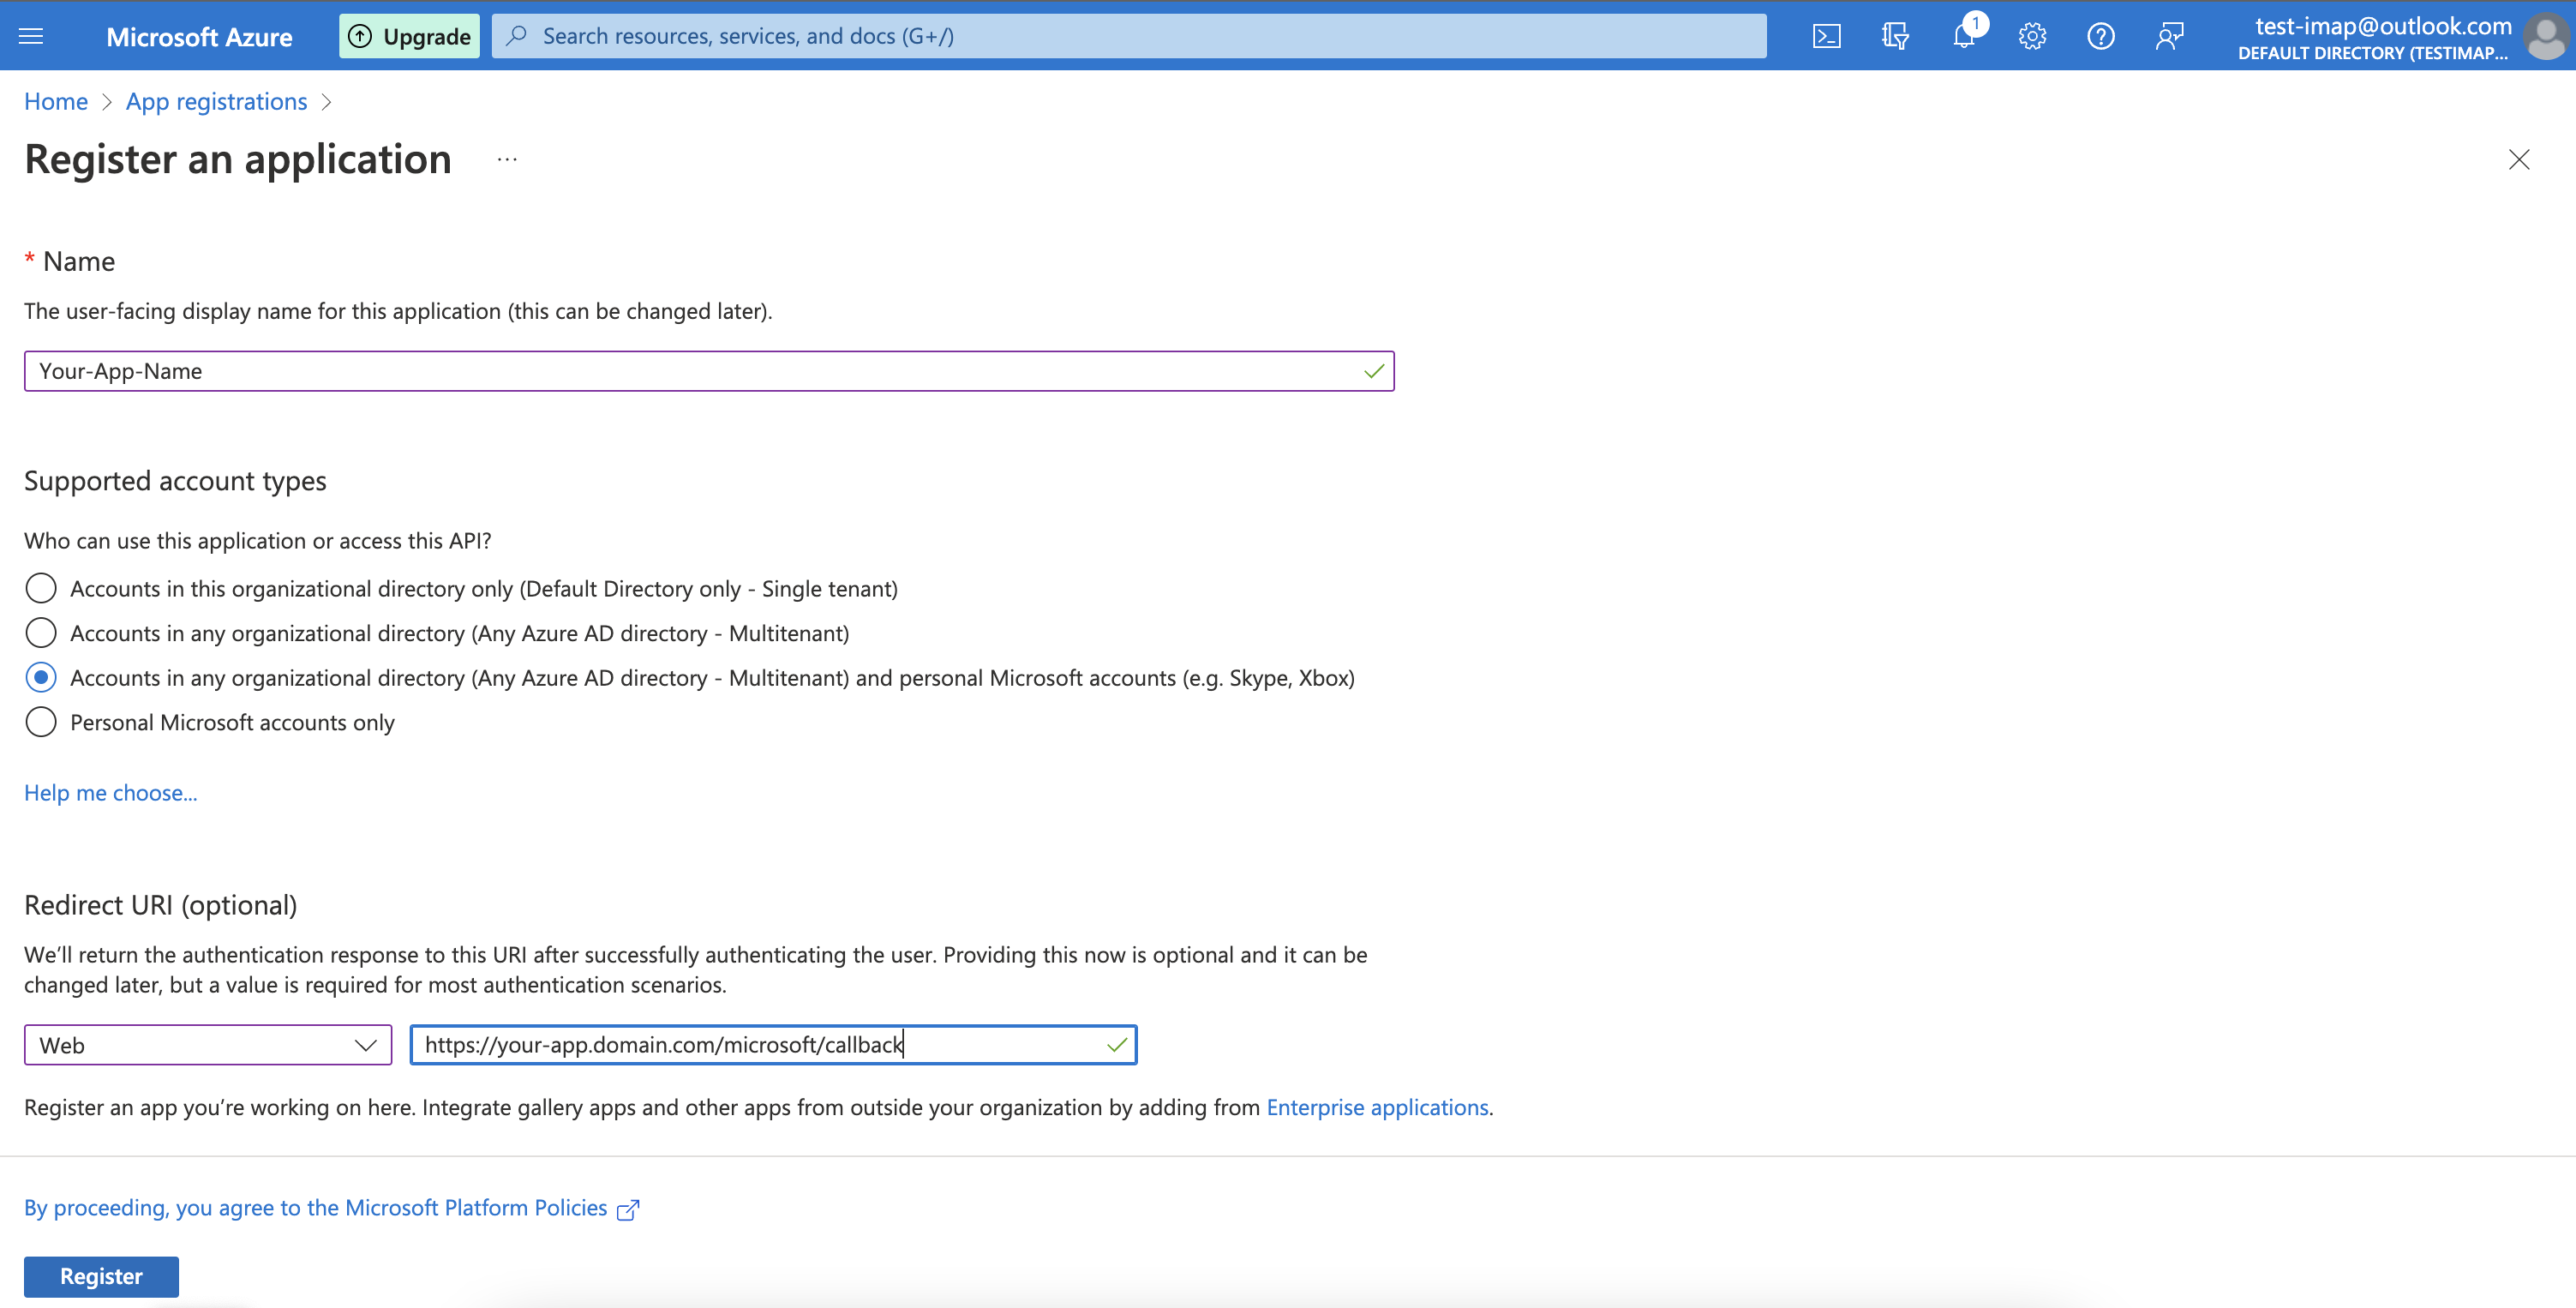
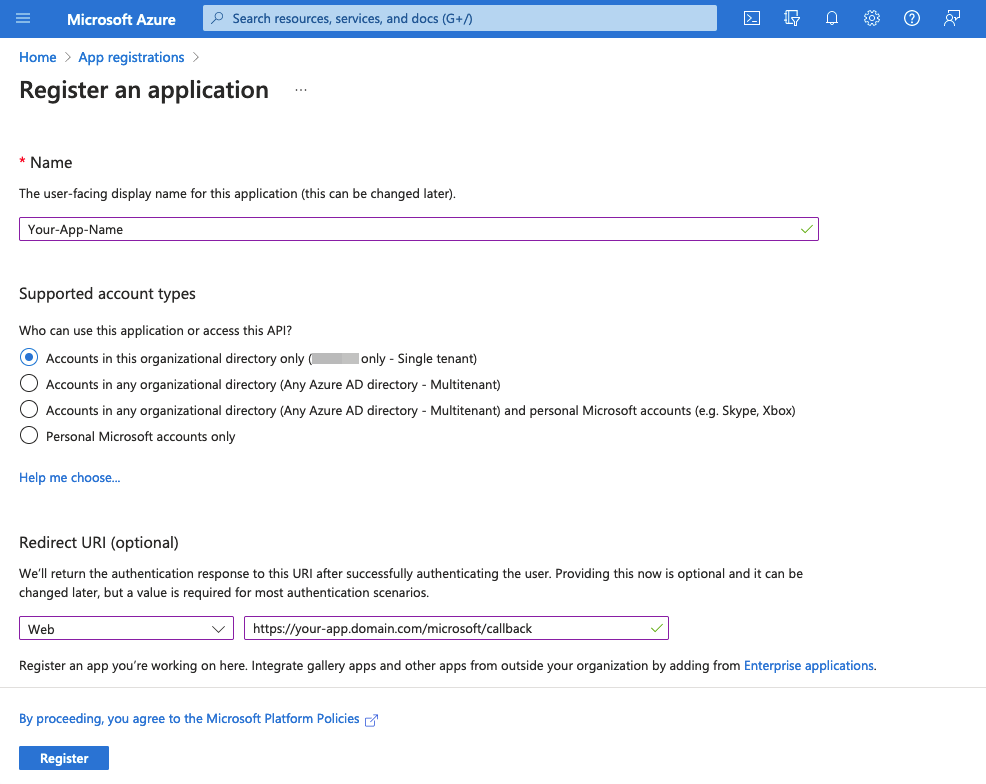
- In the app registration page, click on
New Registrationand select the any account type.
We recommend you'll usually want to setup up 'Single tenant' access (all support inboxes are within the same domain).
Wanting multi-tenant access? This is to support inboxes at multiple domains. Beyond Registering an 'Azure Portal Application' per this guide (which does not require verification for single tenant use), Microsoft will also require you apply for publisher verification of your organisation (This involves providing legal documents to an assessor and can take some time).
Once you register your Azure App, make sure you add proper account type according to your use and add redirect URL for your domain https://{your-domain}/microsoft/callback.
You can find more details about redirect URL here.
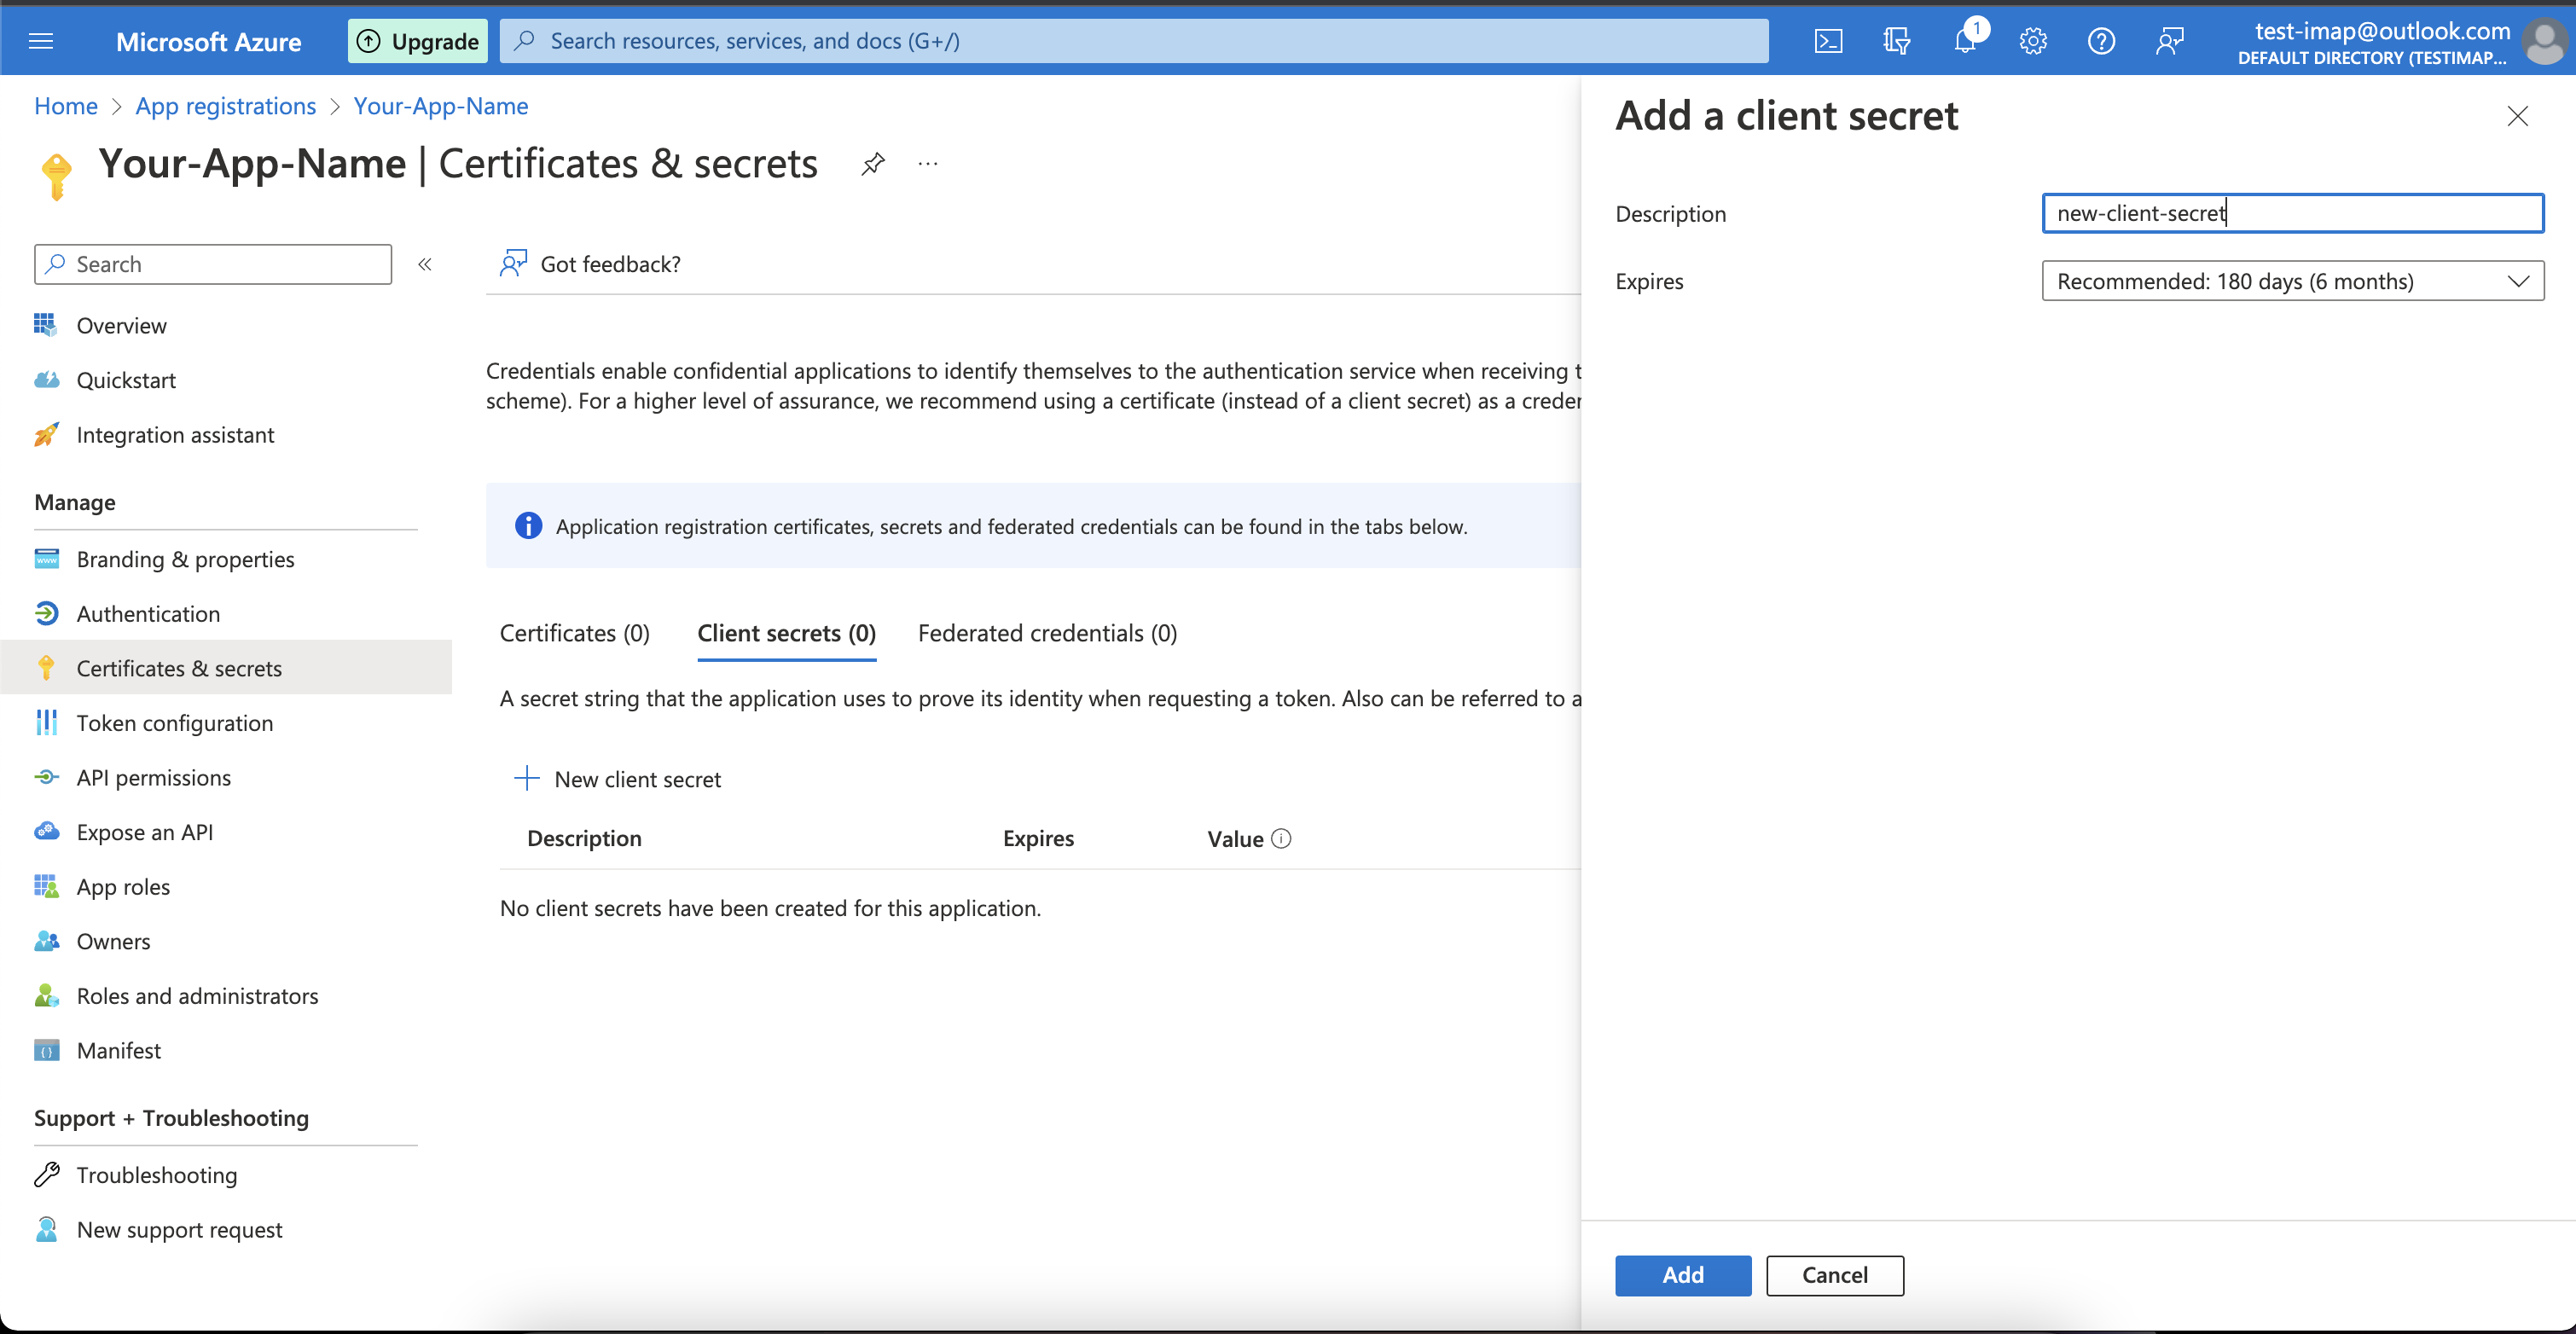
- Then click on
Certificates & Secretstab and add new secret key for your application.
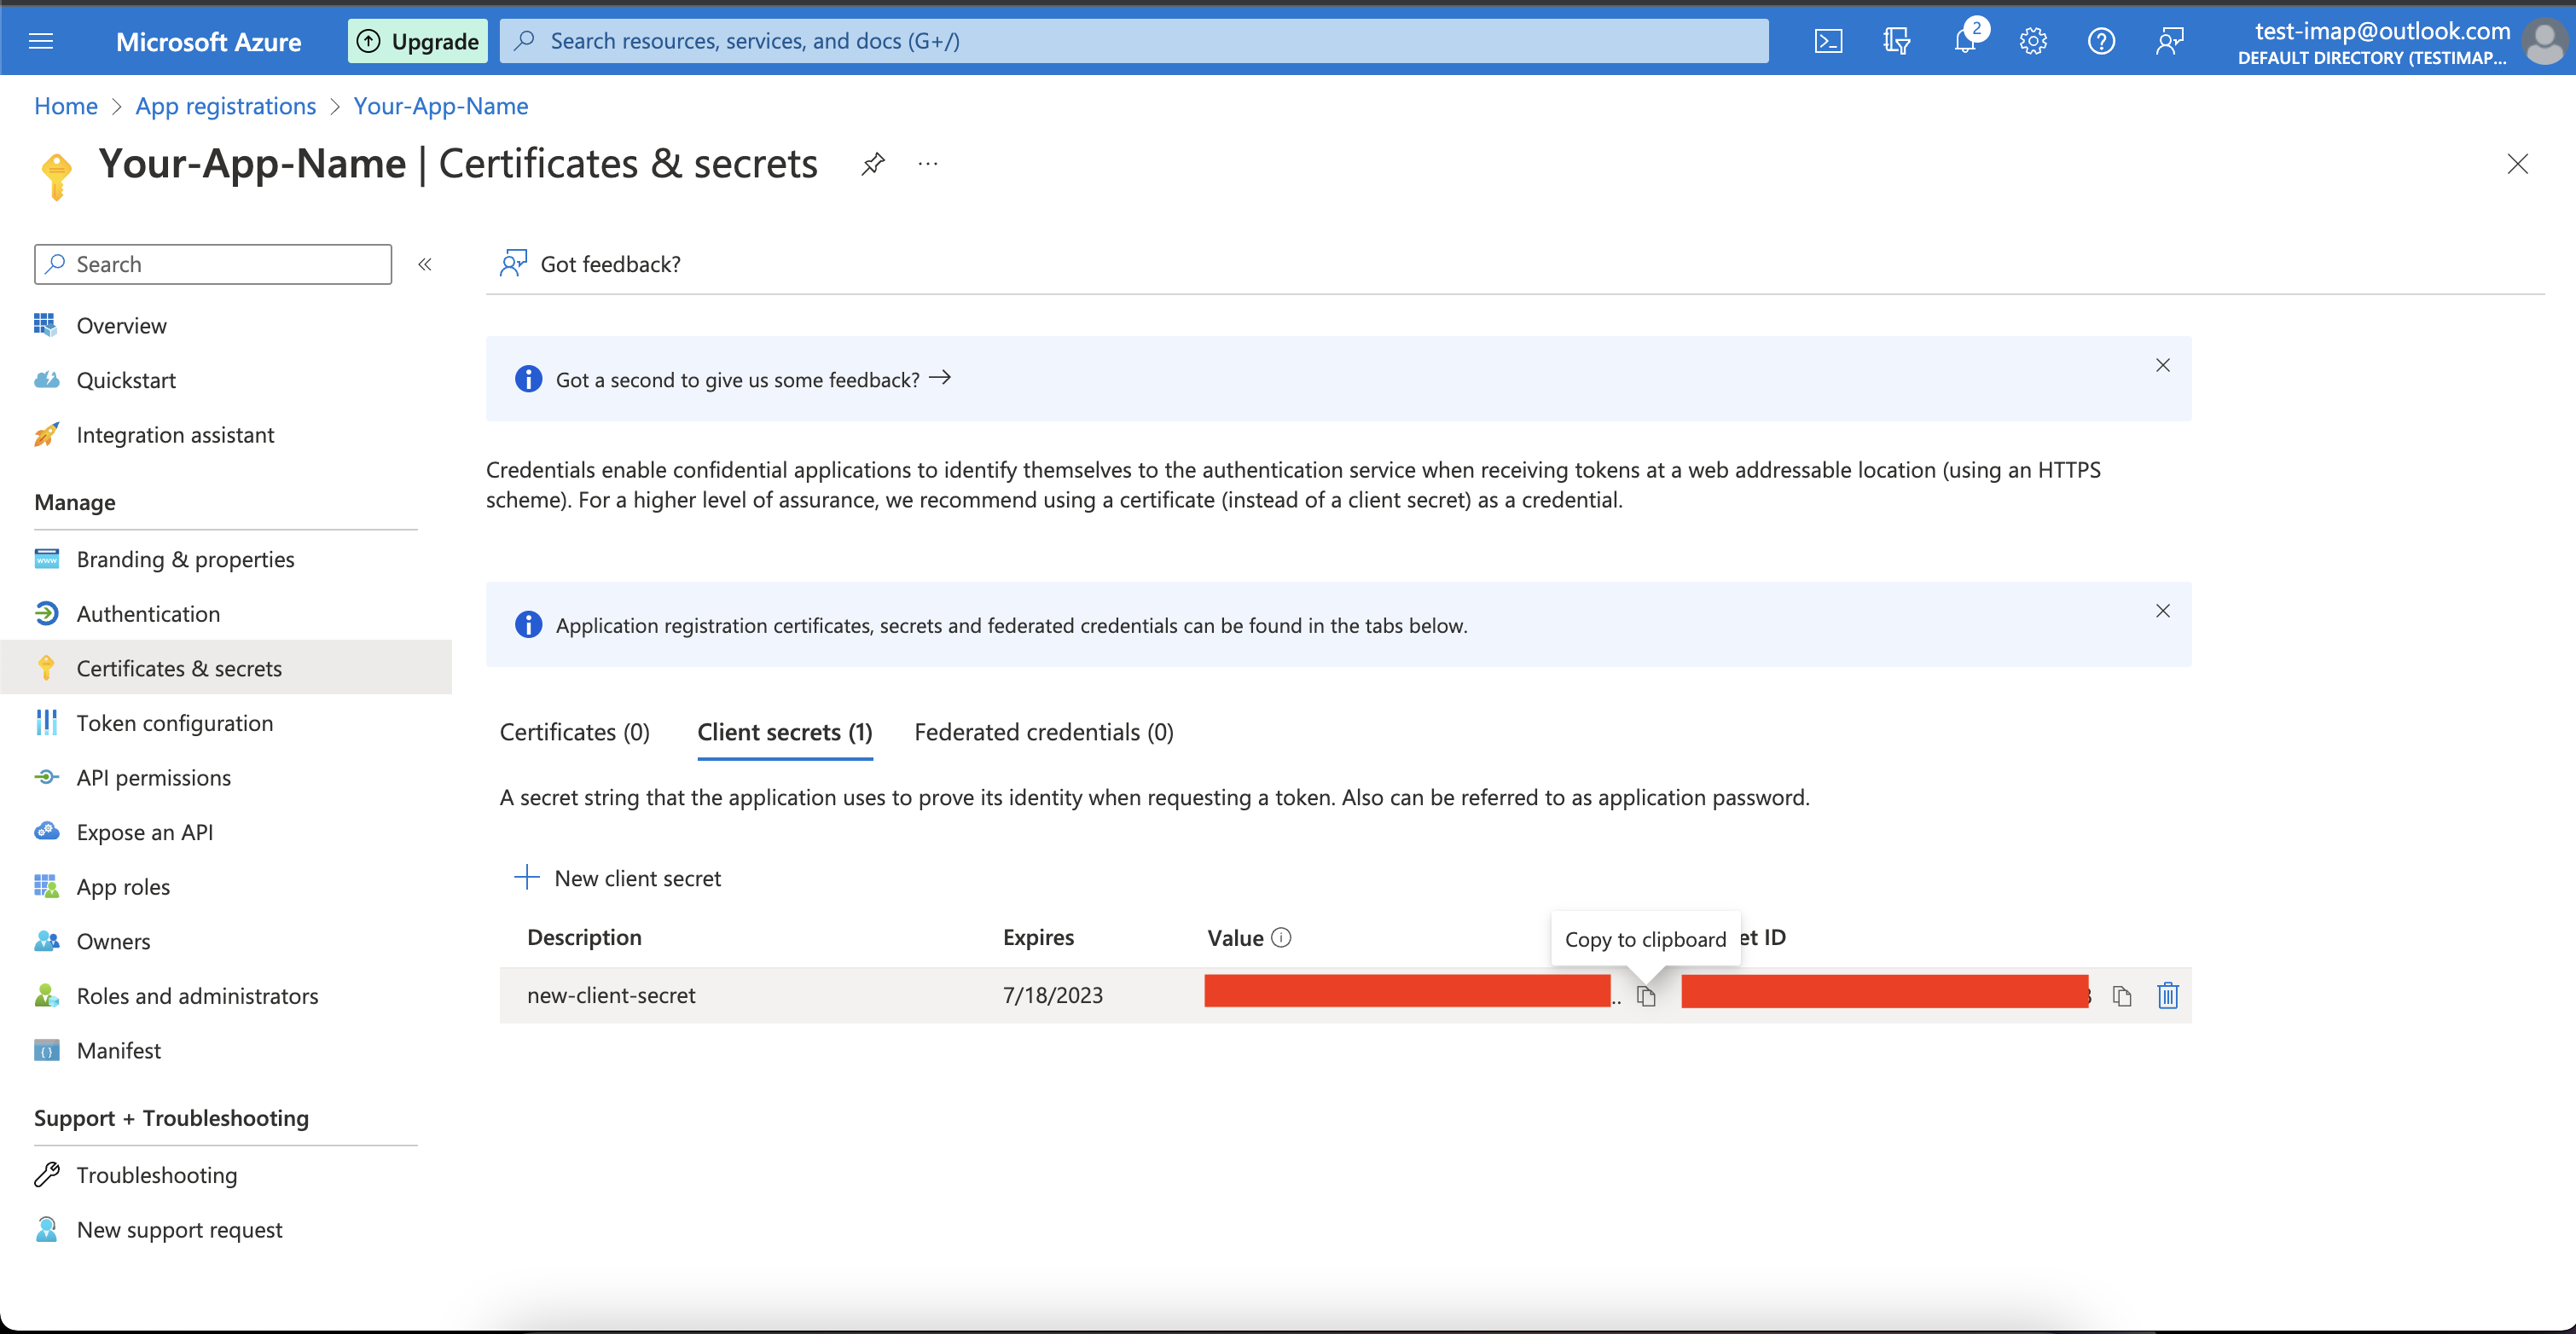
- Then copy the client secret value immidiately after adding the key and store it somewhere, this is your
client_secret.
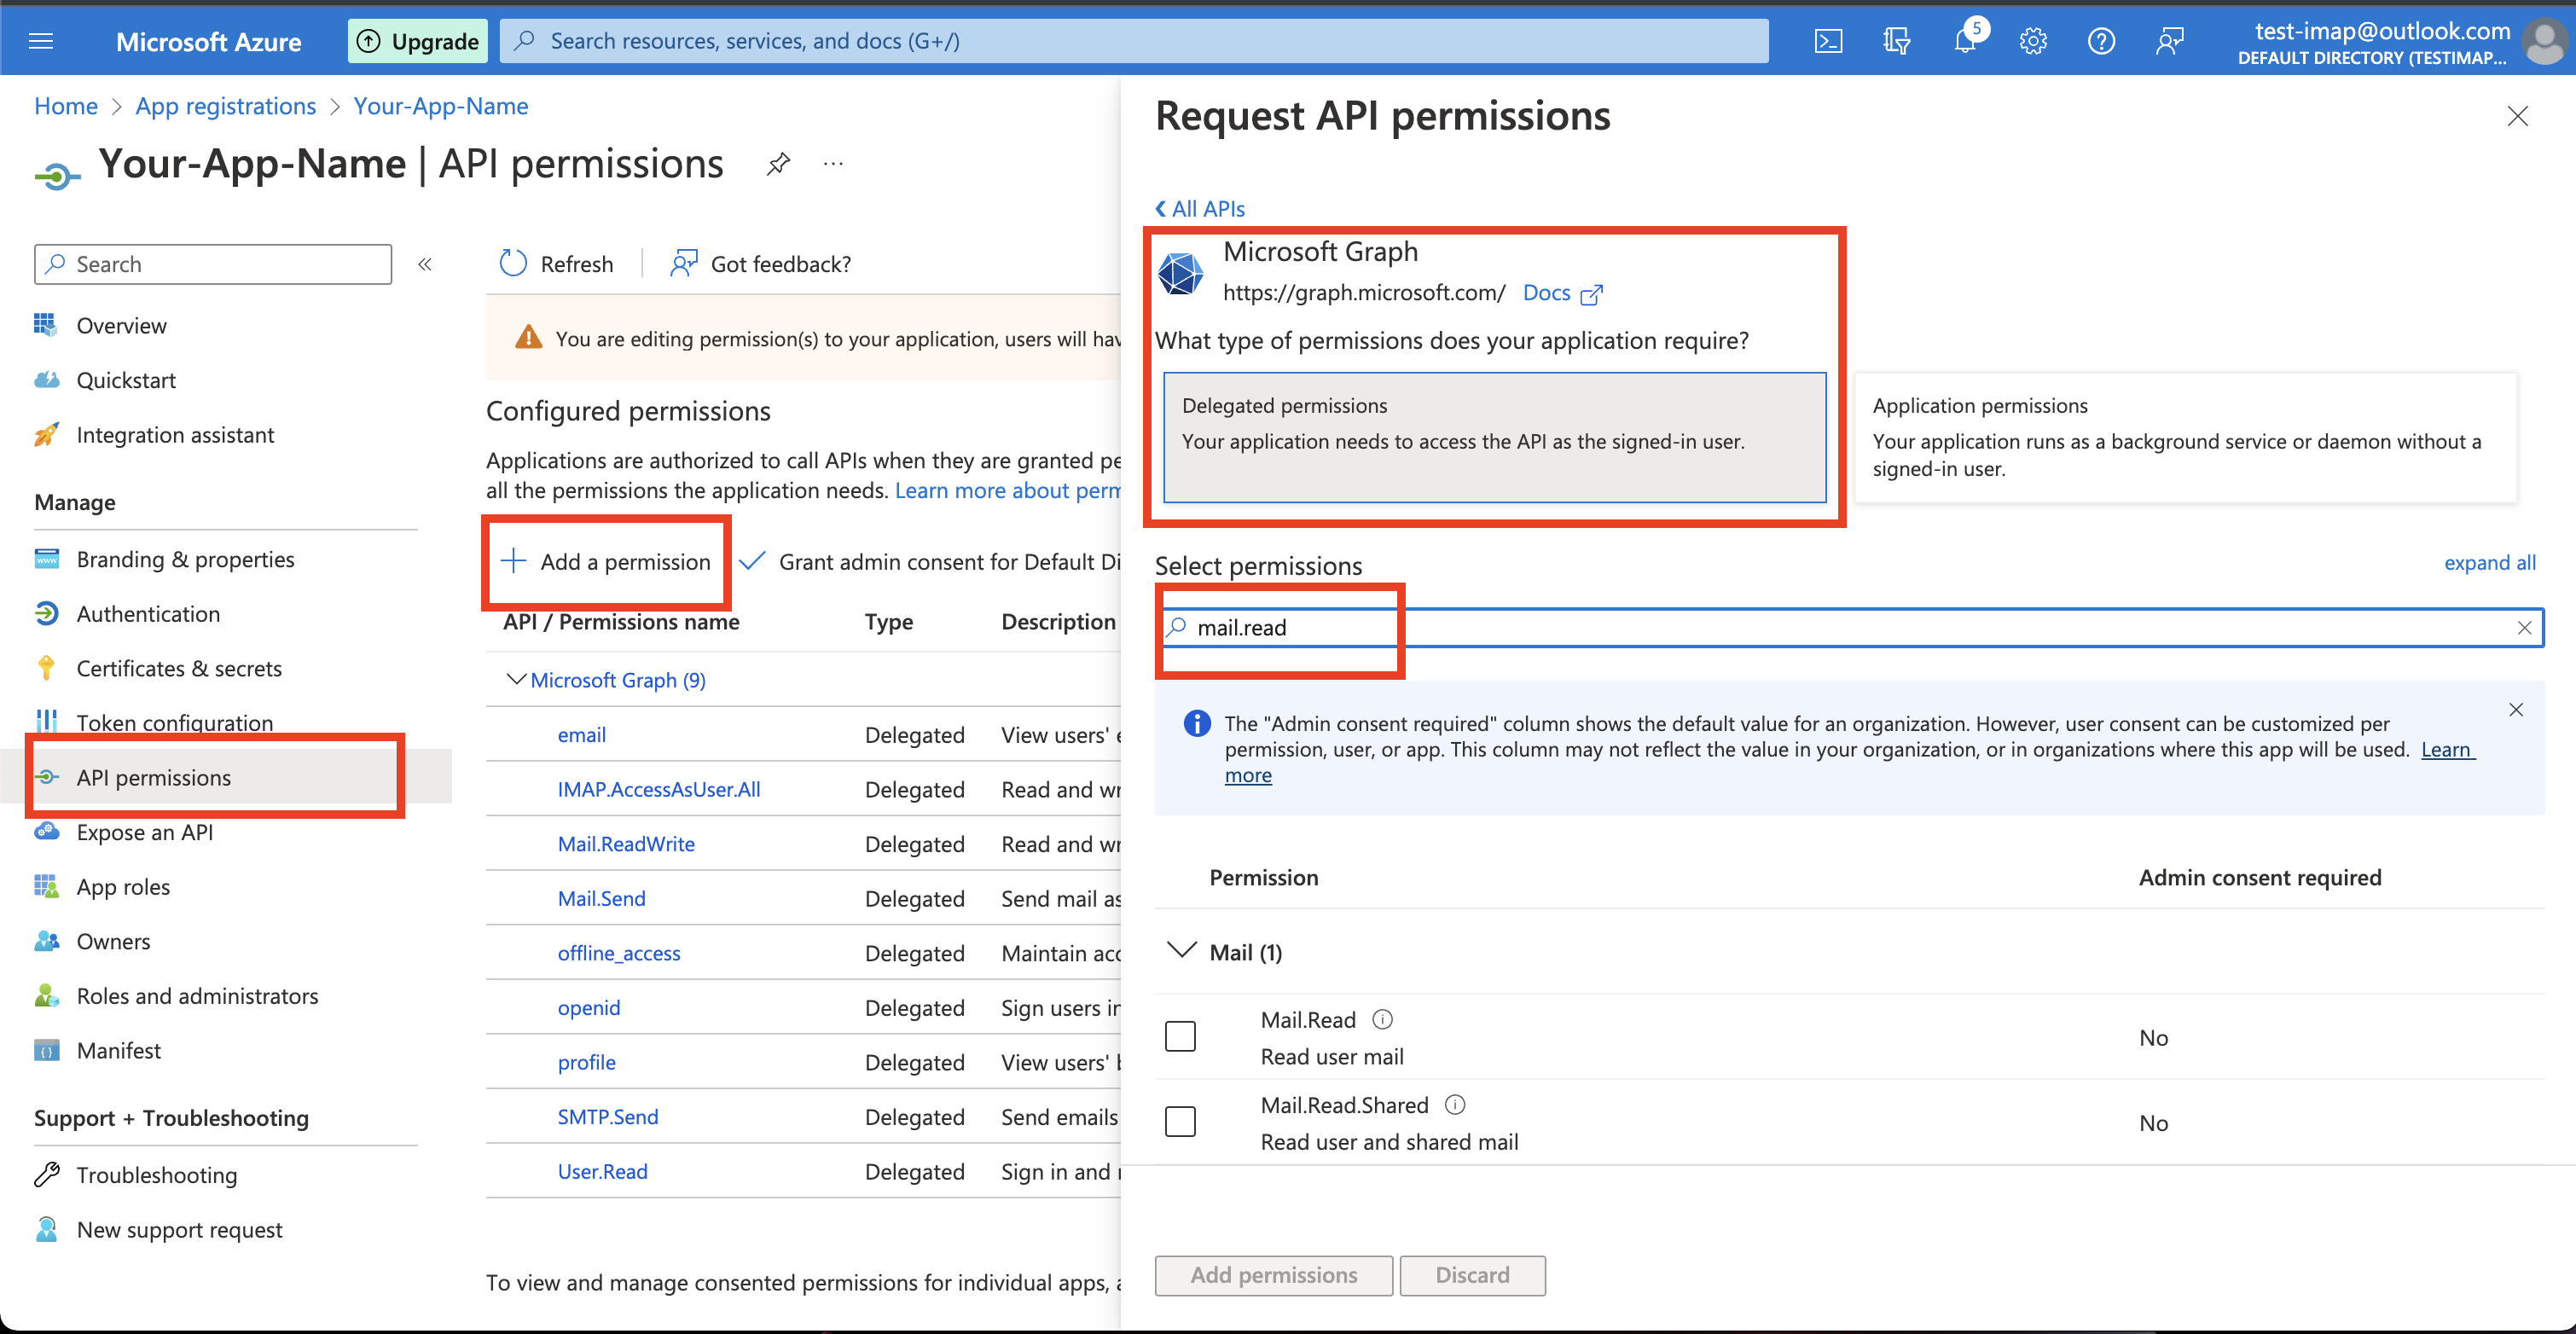
- Click on
API permissionsand add all the permission shown below to integrate email inbox. You can find more details about it here.
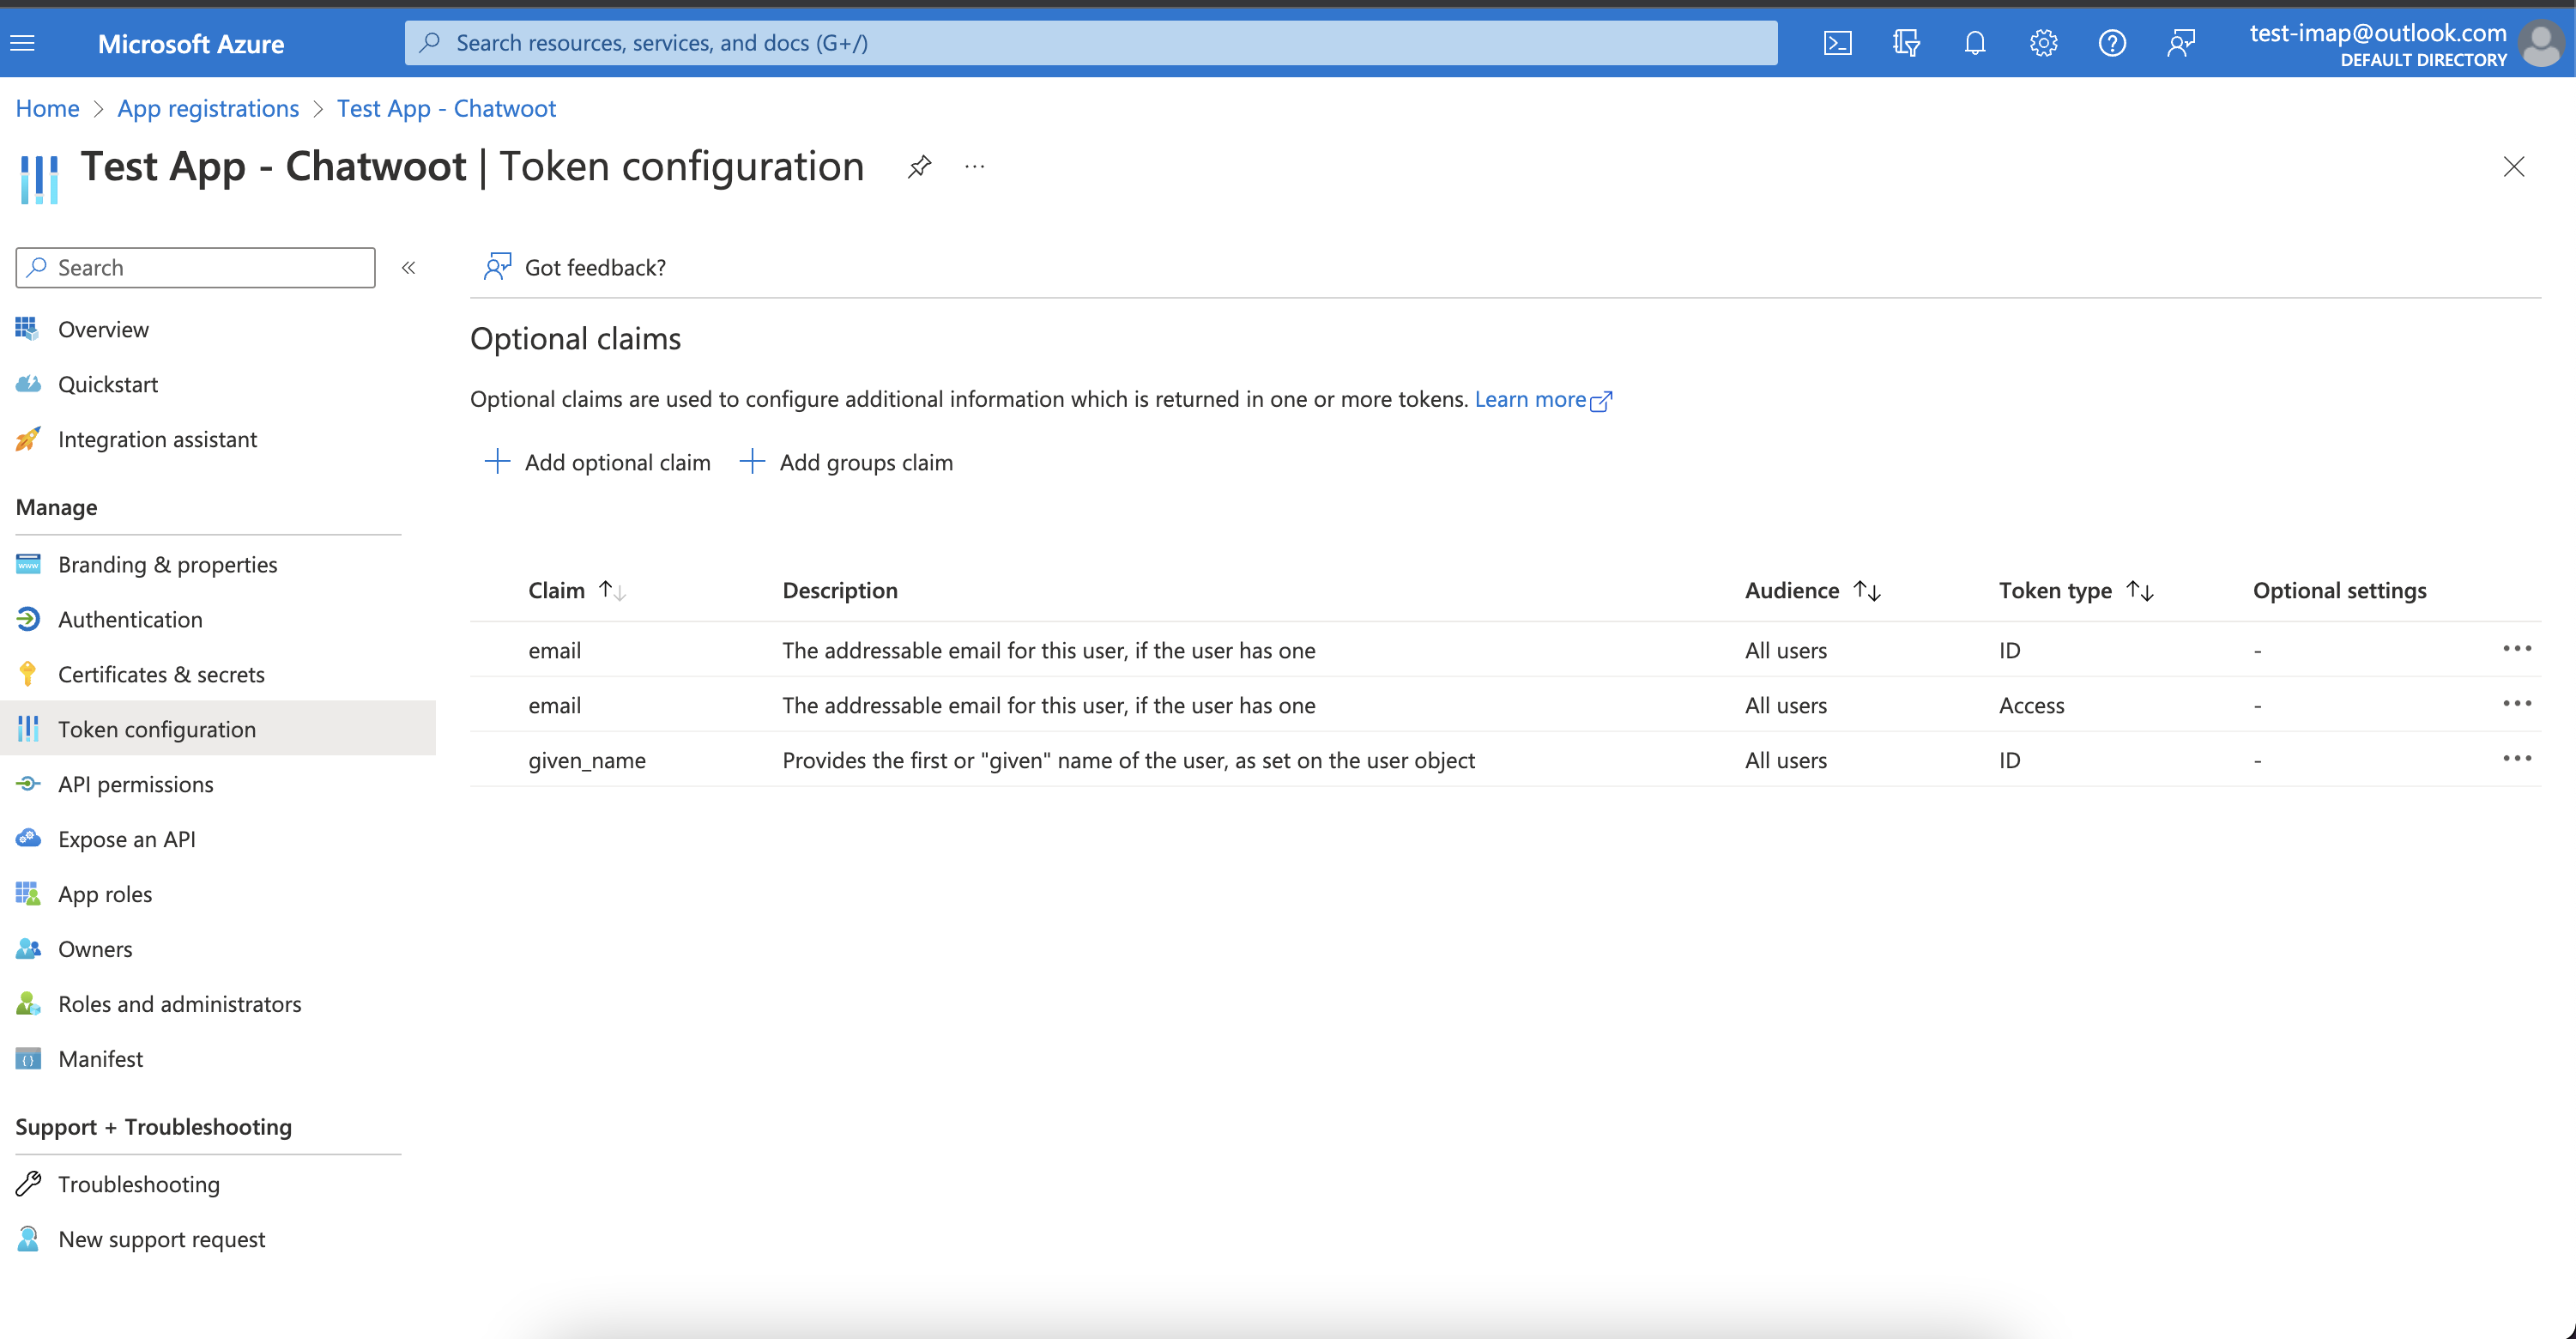
- Click on
Token Configurationand add optional claims shown in the image.
Configuring the Environment Variables in UniLink
Configure the following UniLink environment variables with the values you have obtained during the Azure app setup.
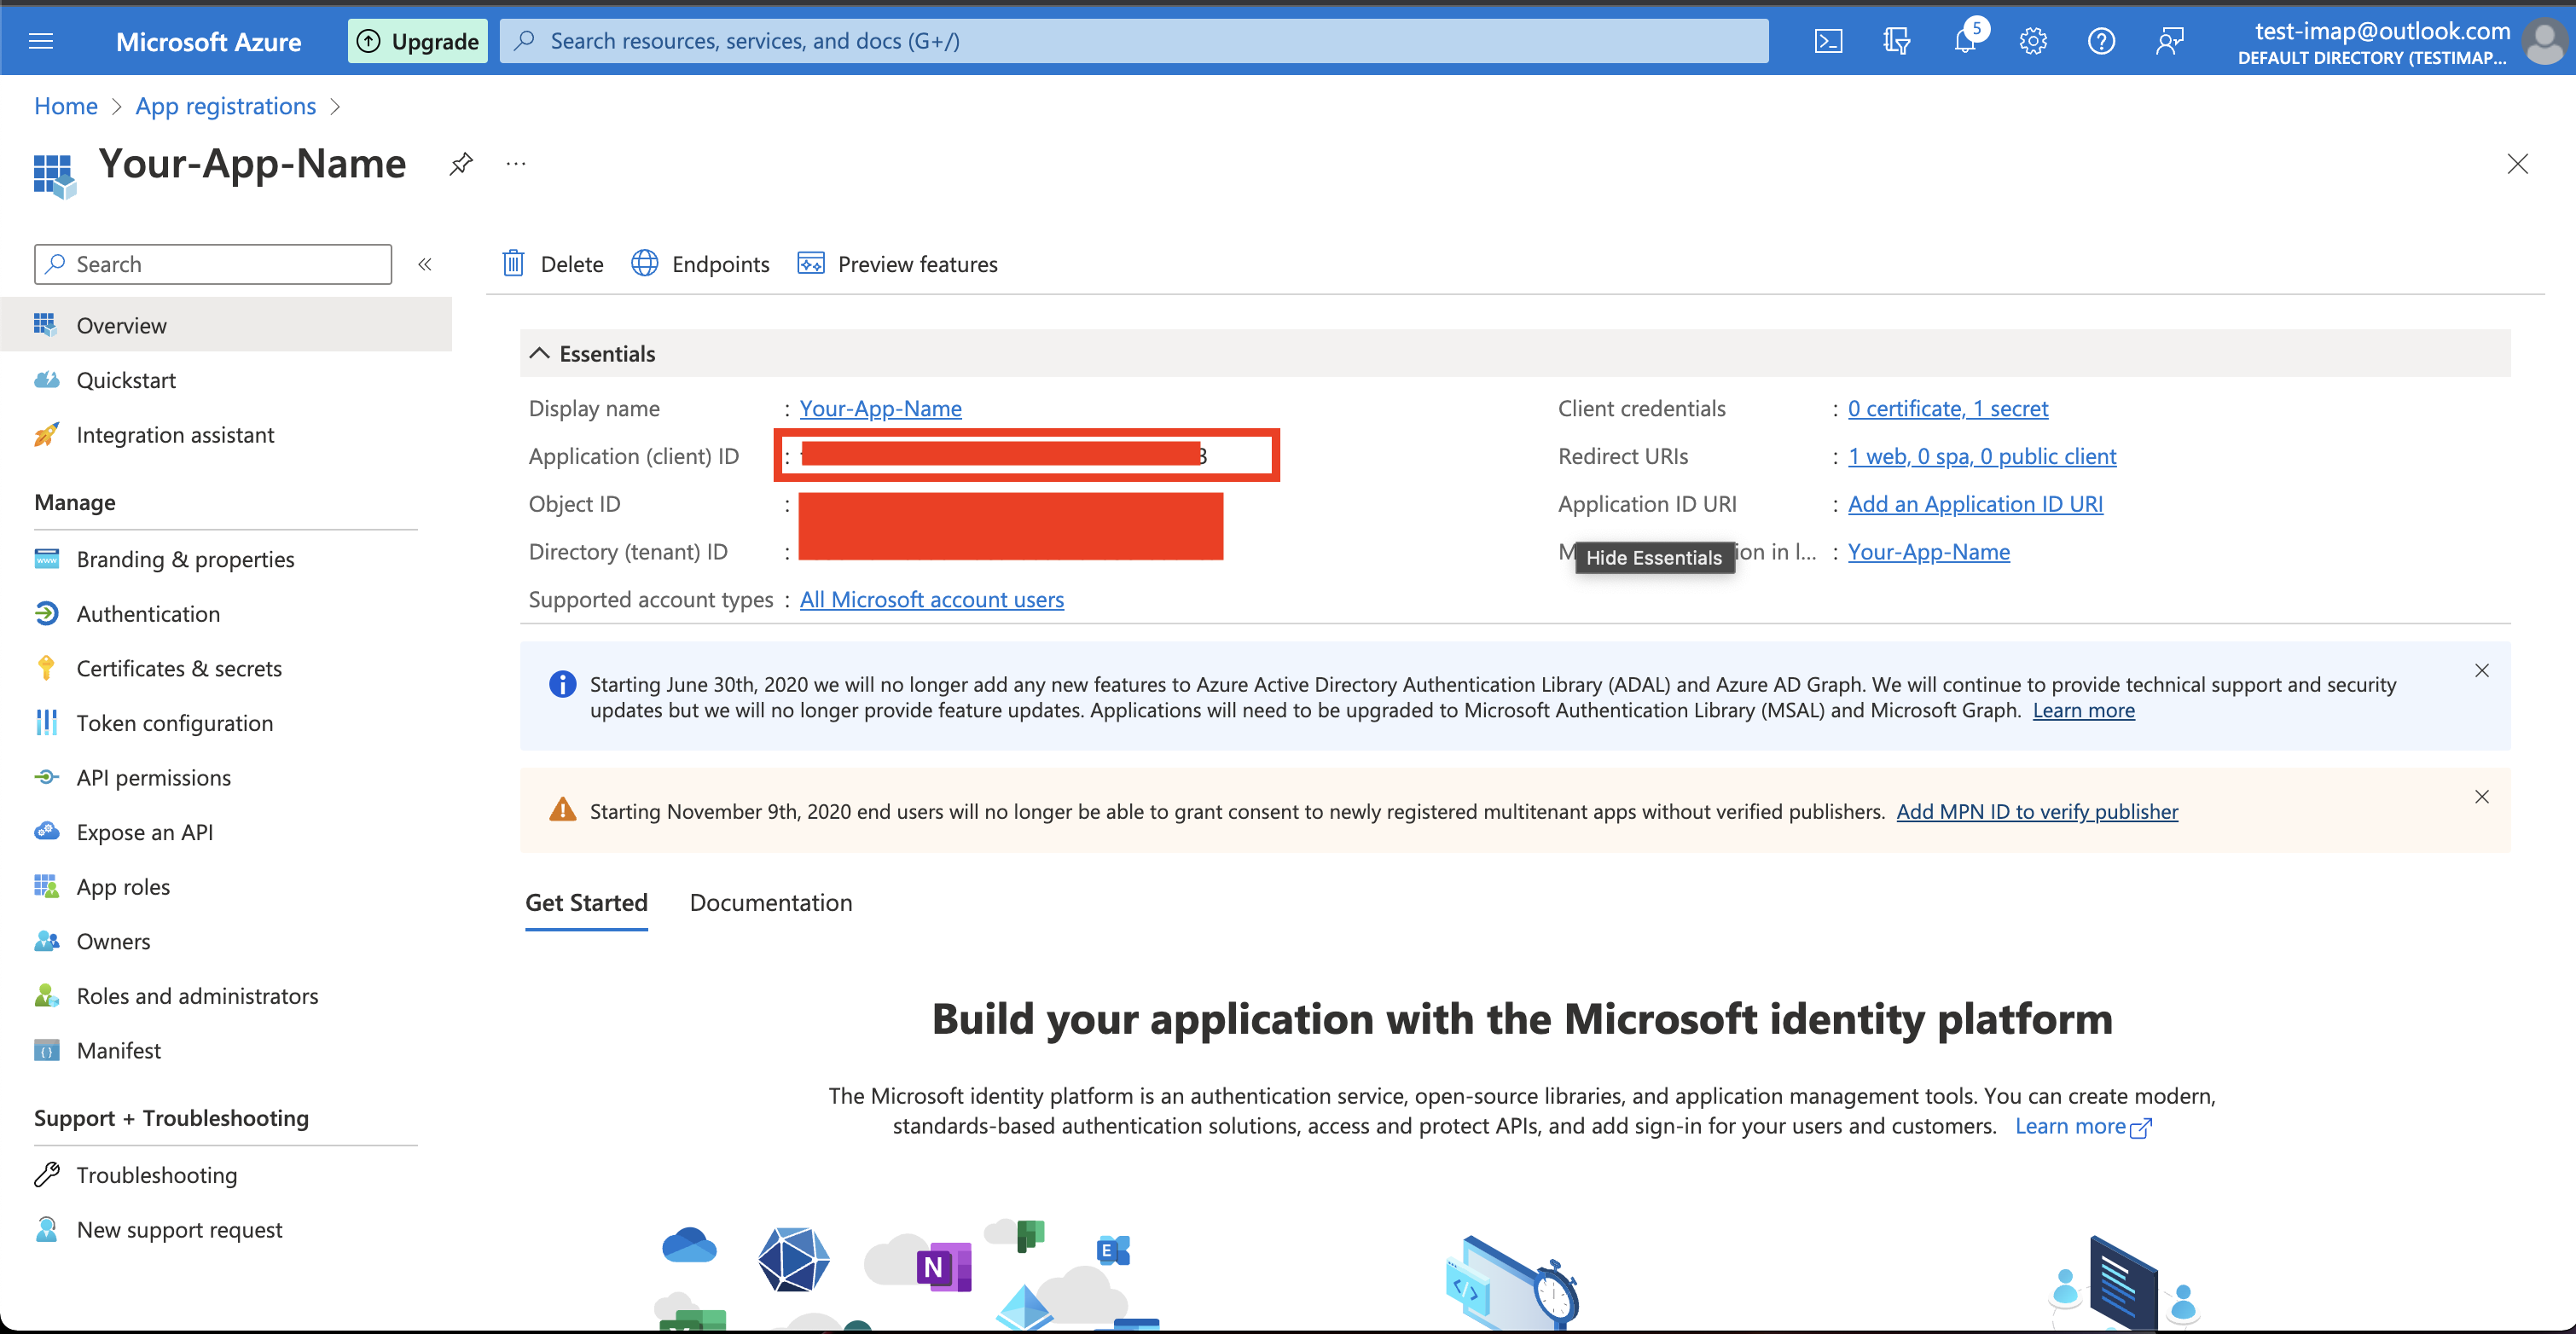
AZURE_APP_ID should be a unique application id or client id you get while configuring the Azure app.
AZURE_APP_SECRET is nothing but the client_secret you got in the third step.
Restart the chatwoot server after updating the environment variables
AZURE_APP_SECRET=
AZURE_APP_ID=
Testing the Azure app with outlook email channel
Until the application is verified for production, You will see unverified during the authorization from the authorization prompt. To test the changes until the app is verified for production. You should use the azure app registration email address in chatwoot channel and you would be able to test the flow on your local or any other instance.
Going into production.
Skip this if you didn't opt for multi-tenant access
Before you can start using your Azure app in production, you will have to get it verified by Azure. Refer to the docs on getting your app verified. And learn more about publisher verification here
- Go to:
Branding & Propertiesand add your domain details, and then clickVerify and Save.
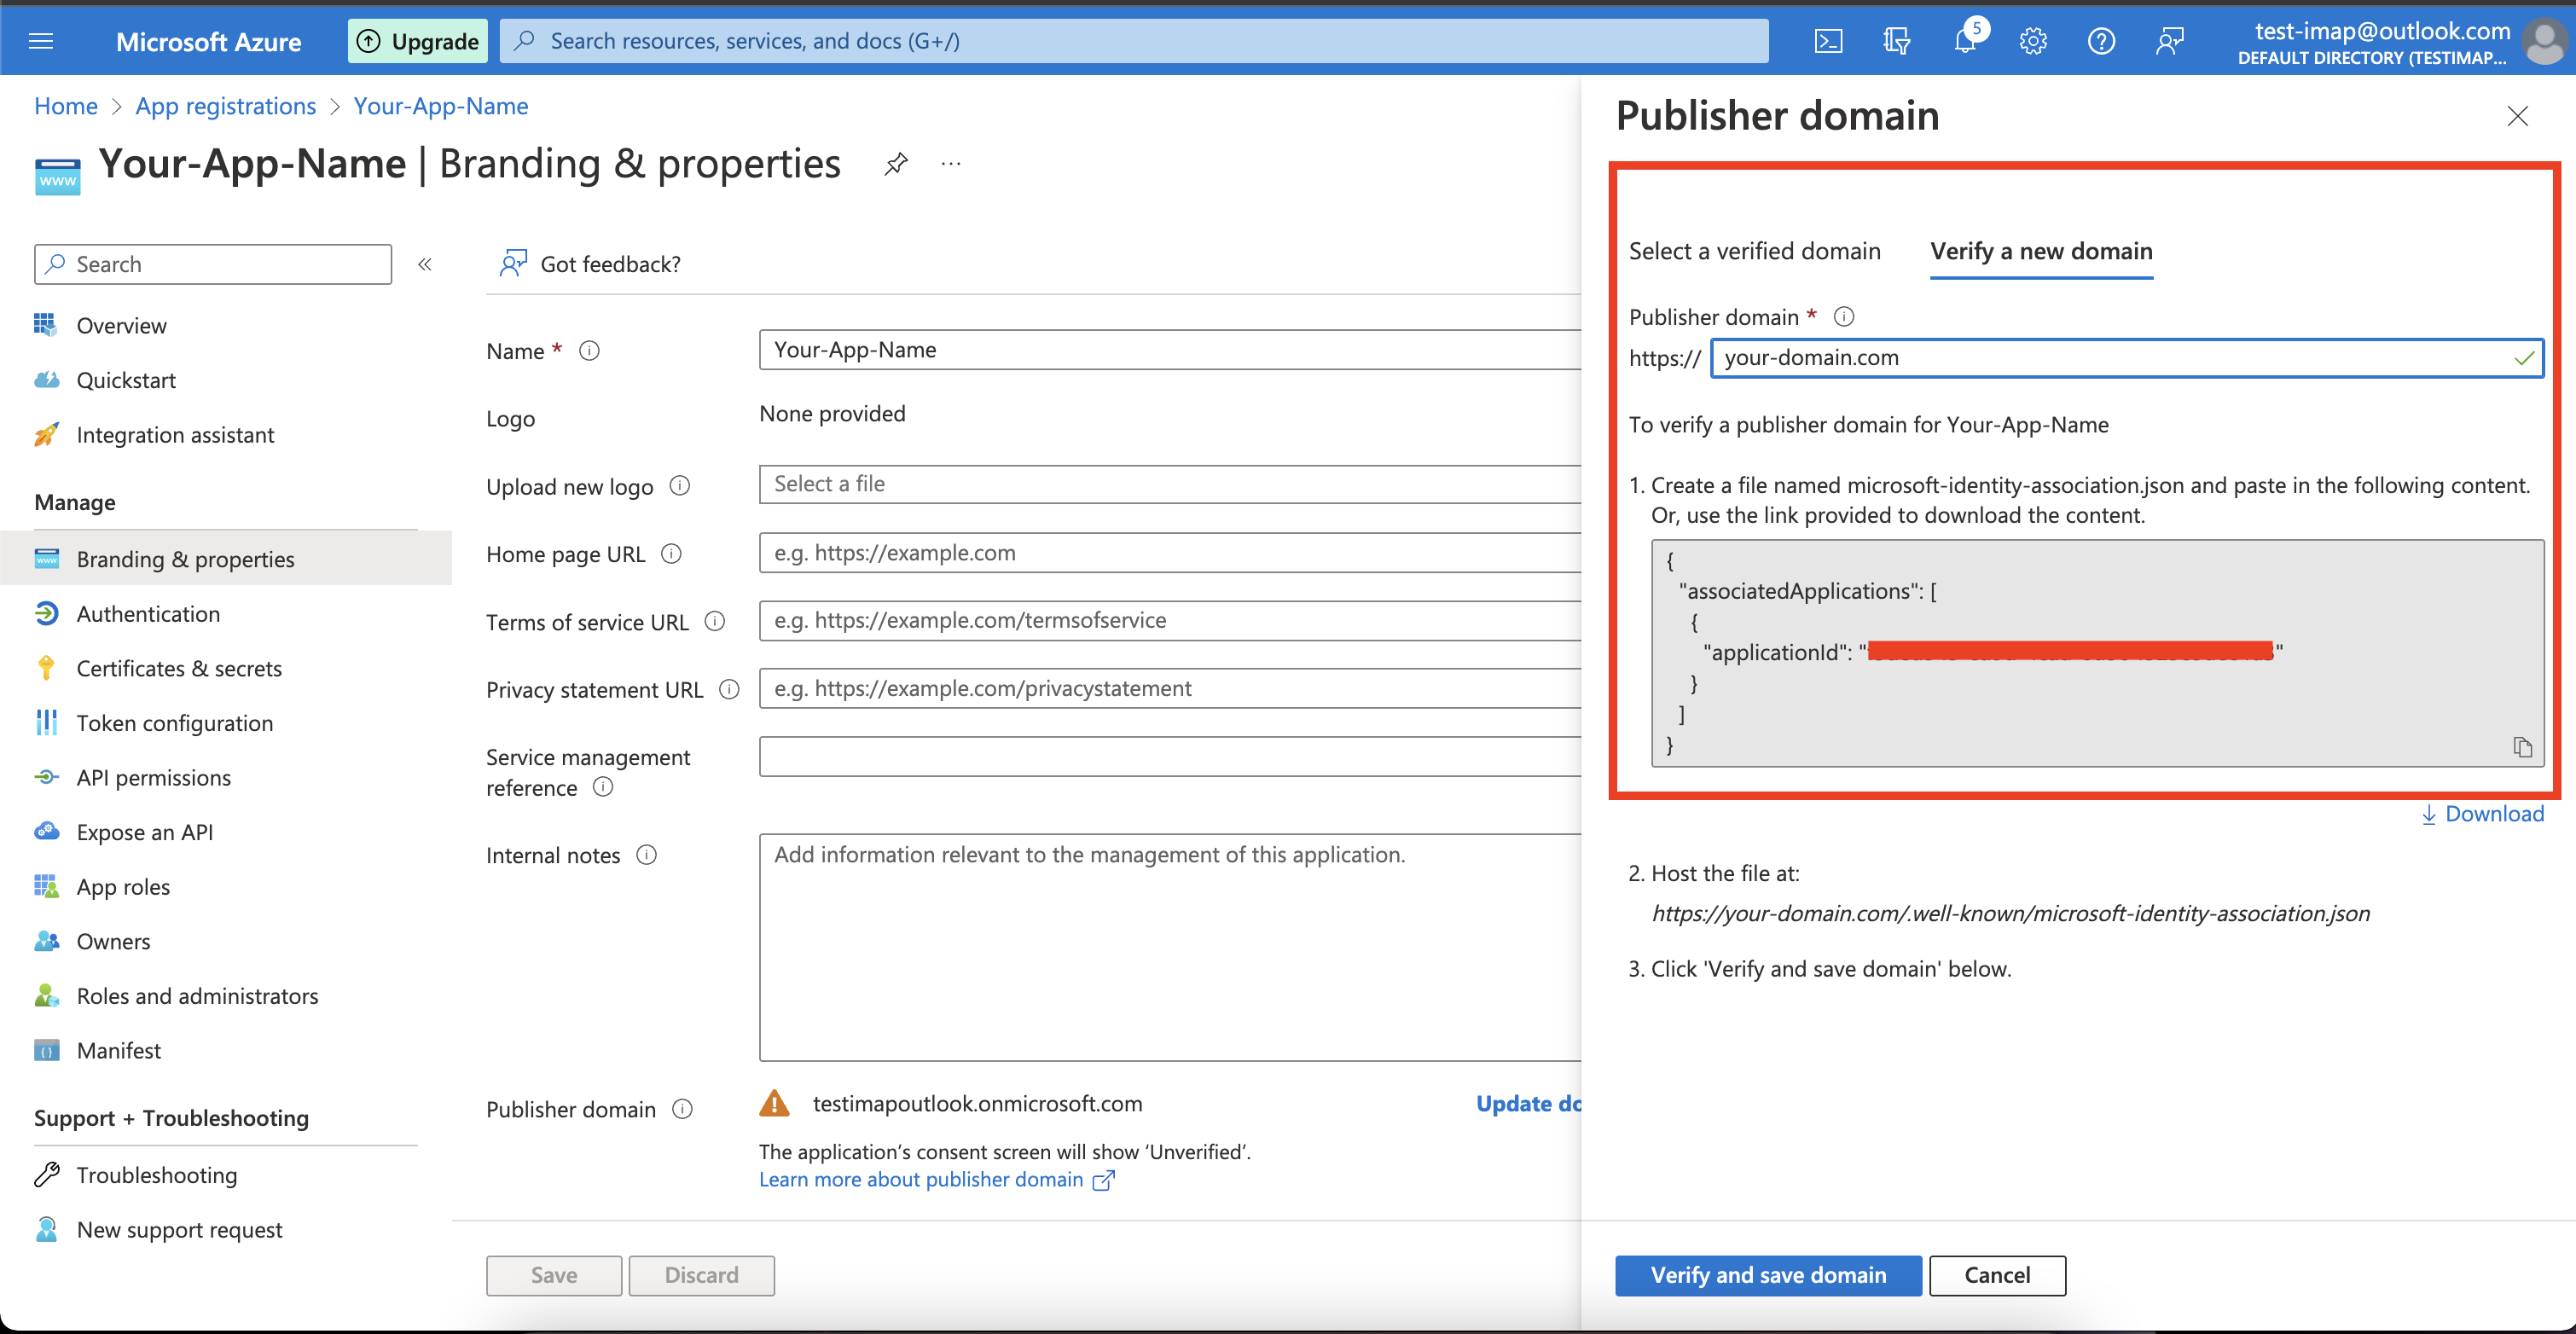
We are handling the mentioned steps about the hosting microsoft-identity-association.json.
Once you set AZURE_APP_ID in your environment variable, consider this step is completed.
Next steps
You're done! Next, you should enable the outlook email channel in chatwoot inbox.
Consider test-imap@outlook.com is an email for which you are adding a new inbox.
NOTE
If you changed access in step 1 (above) from 'single-tenancy' any of the 'multi-tenancy' access levels, you will need to get your publisher verified to be able to attach and fetch mails from the Azure app with any other outlook email. Publisher verification not required if you are setting up 'single tenancy' accesss.