AWS UniLink deployment guide
The following is the guide for deploying UniLink on AWS using the marketplace listing. Use our helm charts with AWS Elastic Kubernetes Service(EKS) for a cloud-native deployment.
Prerequisites
- AWS account
Install UniLink via AWS marketplace AMI
Go to UniLink AWS marketplace listing and click on subscribe.
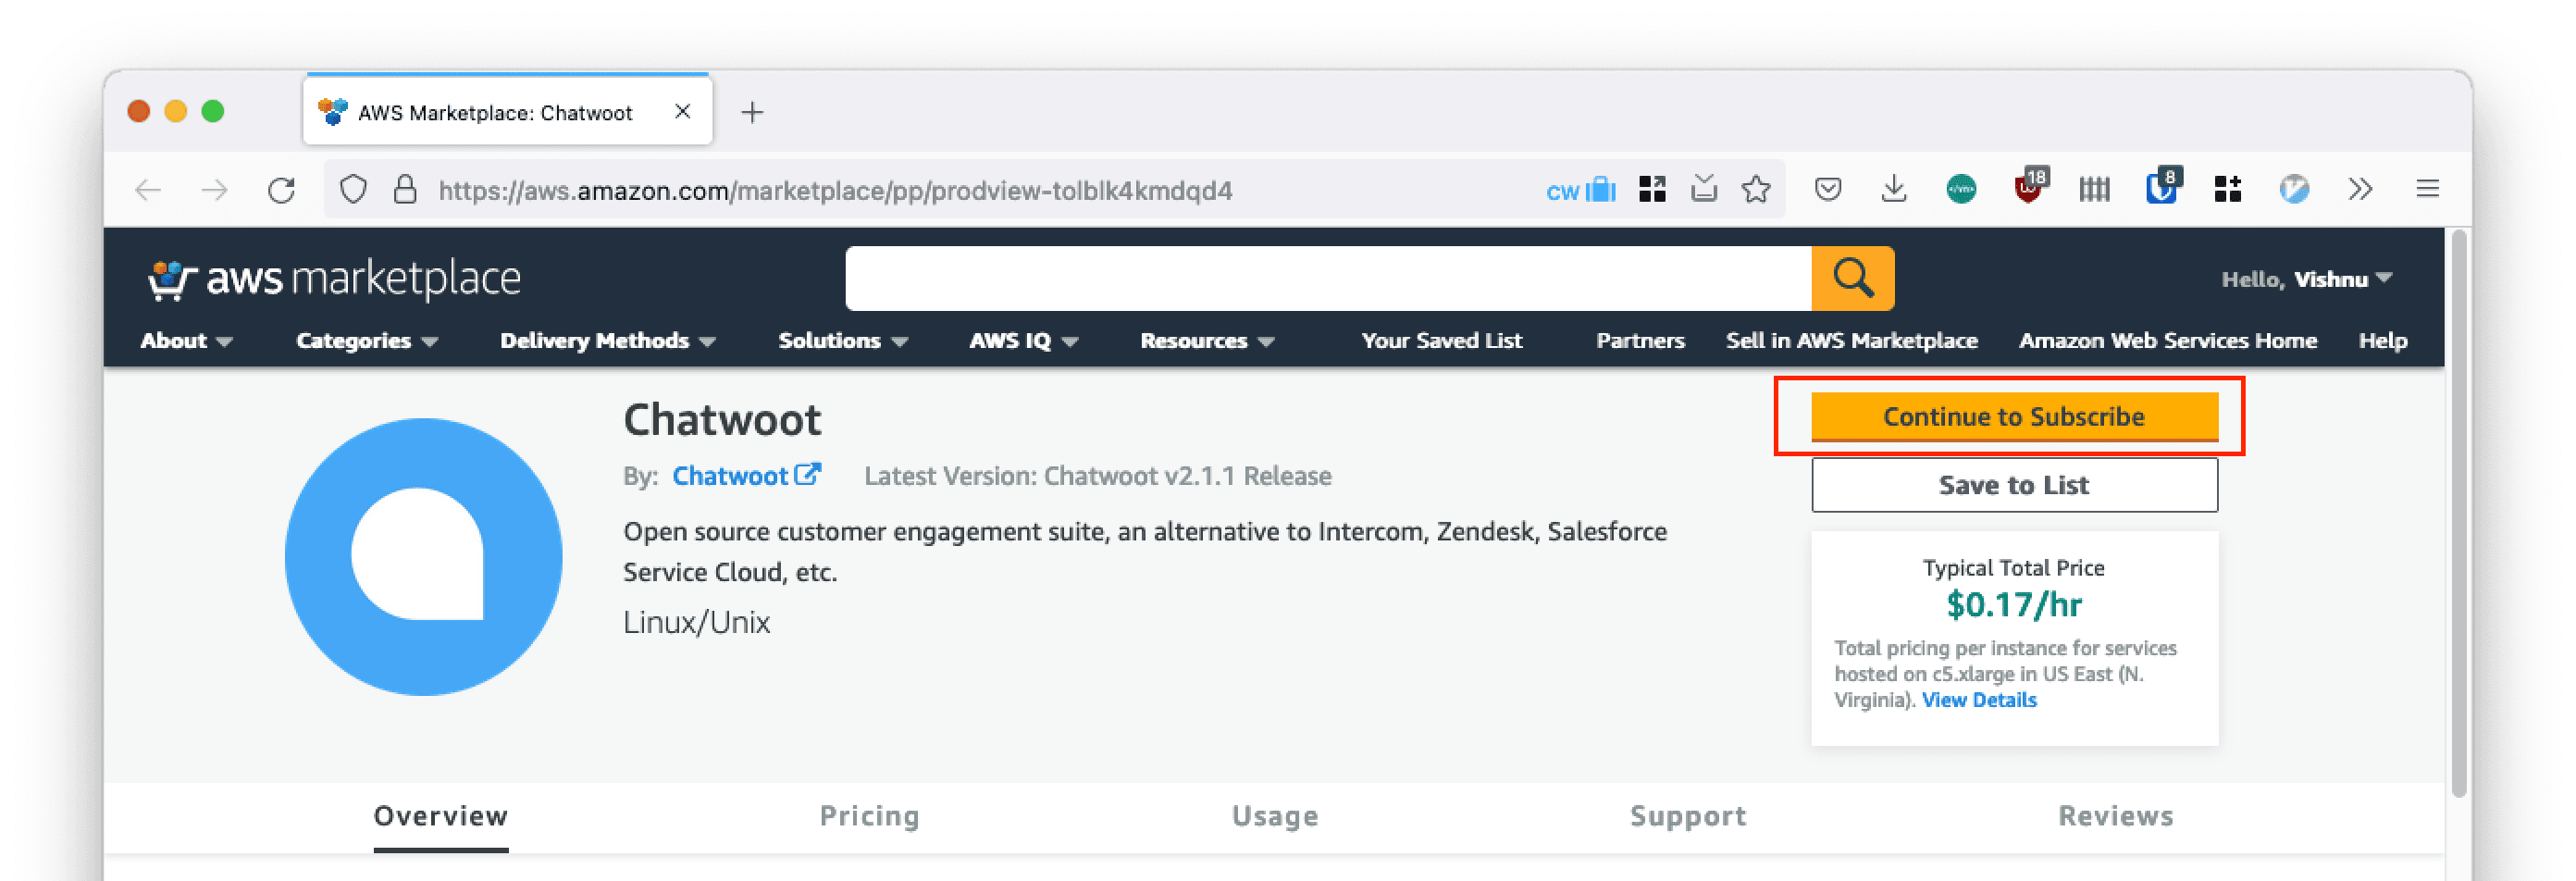
Sign in with your AWS account.

Click on
Continue to Configuration.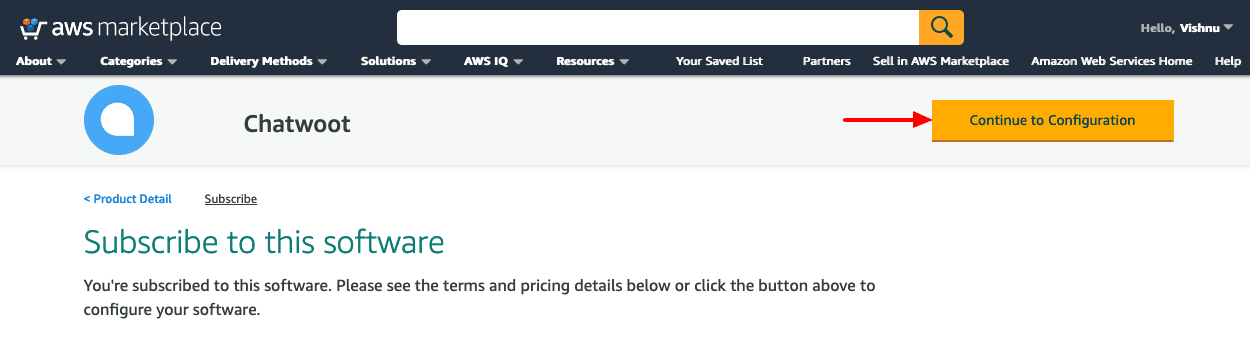
Select the latest version in
Software Versionand pick your awsregion. ClickContinue to Launch.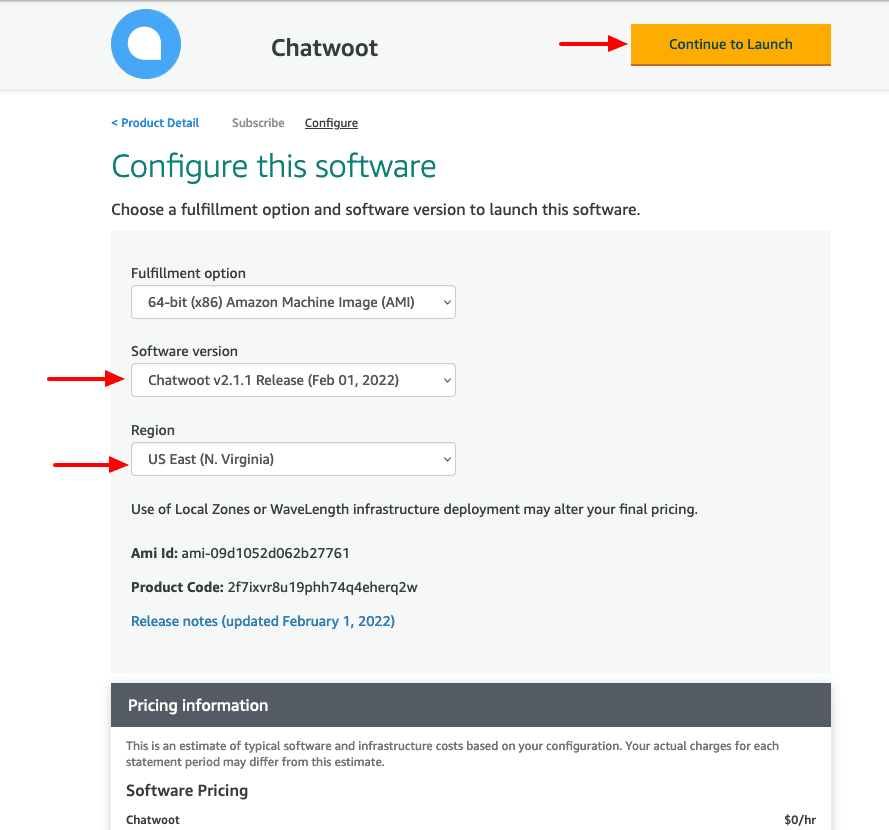
Review the launch configuration. Leave the
Choose Actionfield with the default valueLaunch from Website. Choose a VPC and subnet as per your AWS region preference.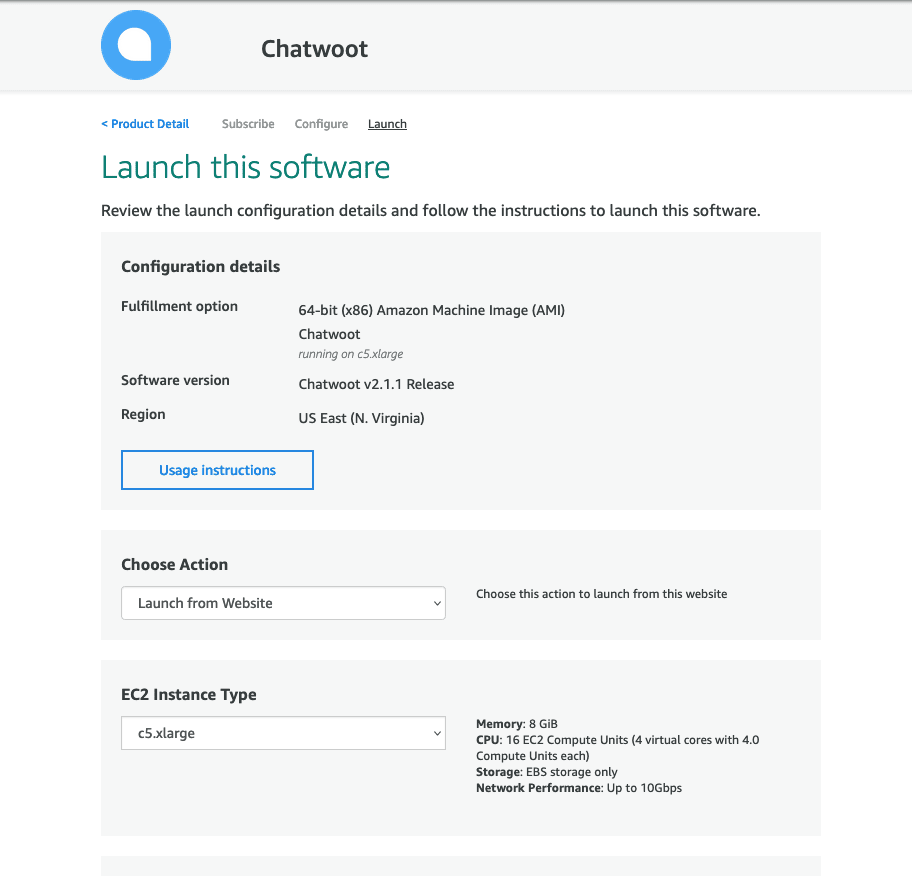
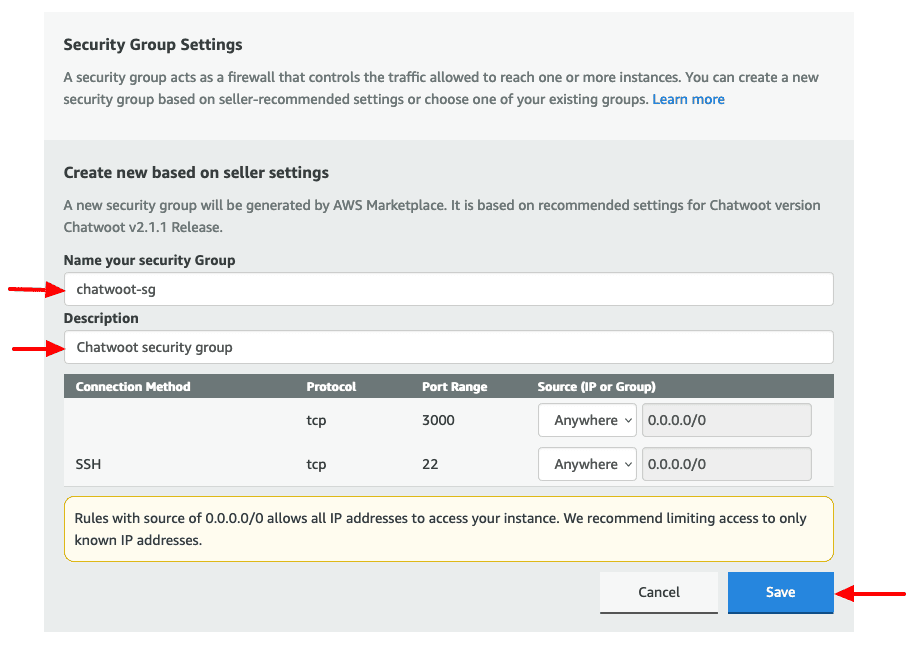
Scroll down to the
security groupsection and click createCreate New Based On Seller Settings.
Save the new security group and choose it after creation.
Pick a key pair you already have or create a new one in the region you are deploying. Click
Launch.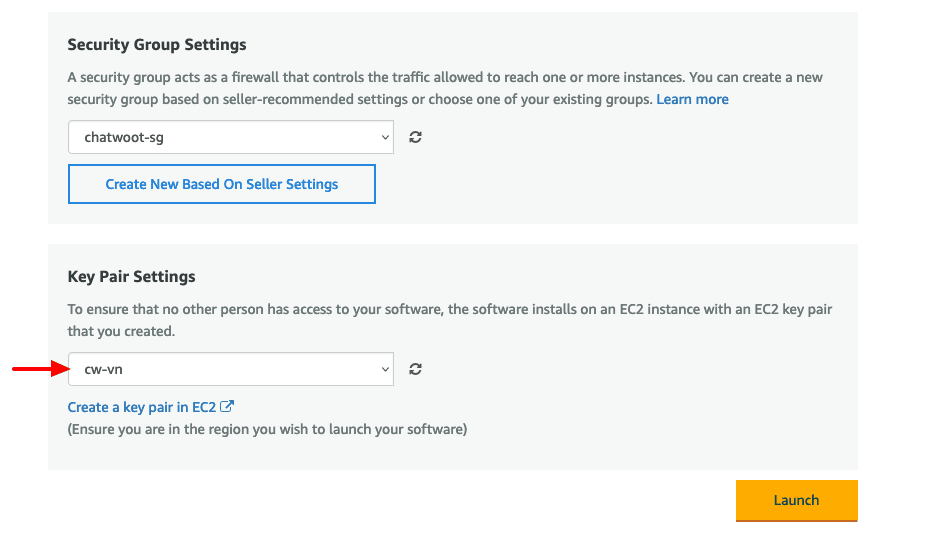
AWS should now display a congratulations screen confirming that UniLink instance is launched successfully. Click on the
EC2 Consolelink.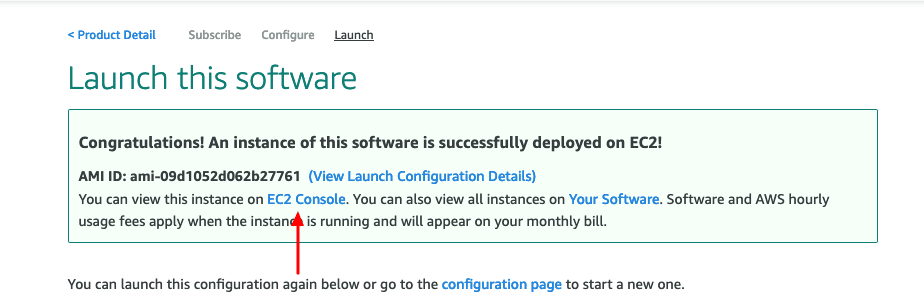
Wait for a few minutes to let the instance come up.

Select the instance and copy the public IP.

Visit
http://<your-public-ip>:3000. This should bring up the UniLink UI. Congratulations. Woot ! Woot !!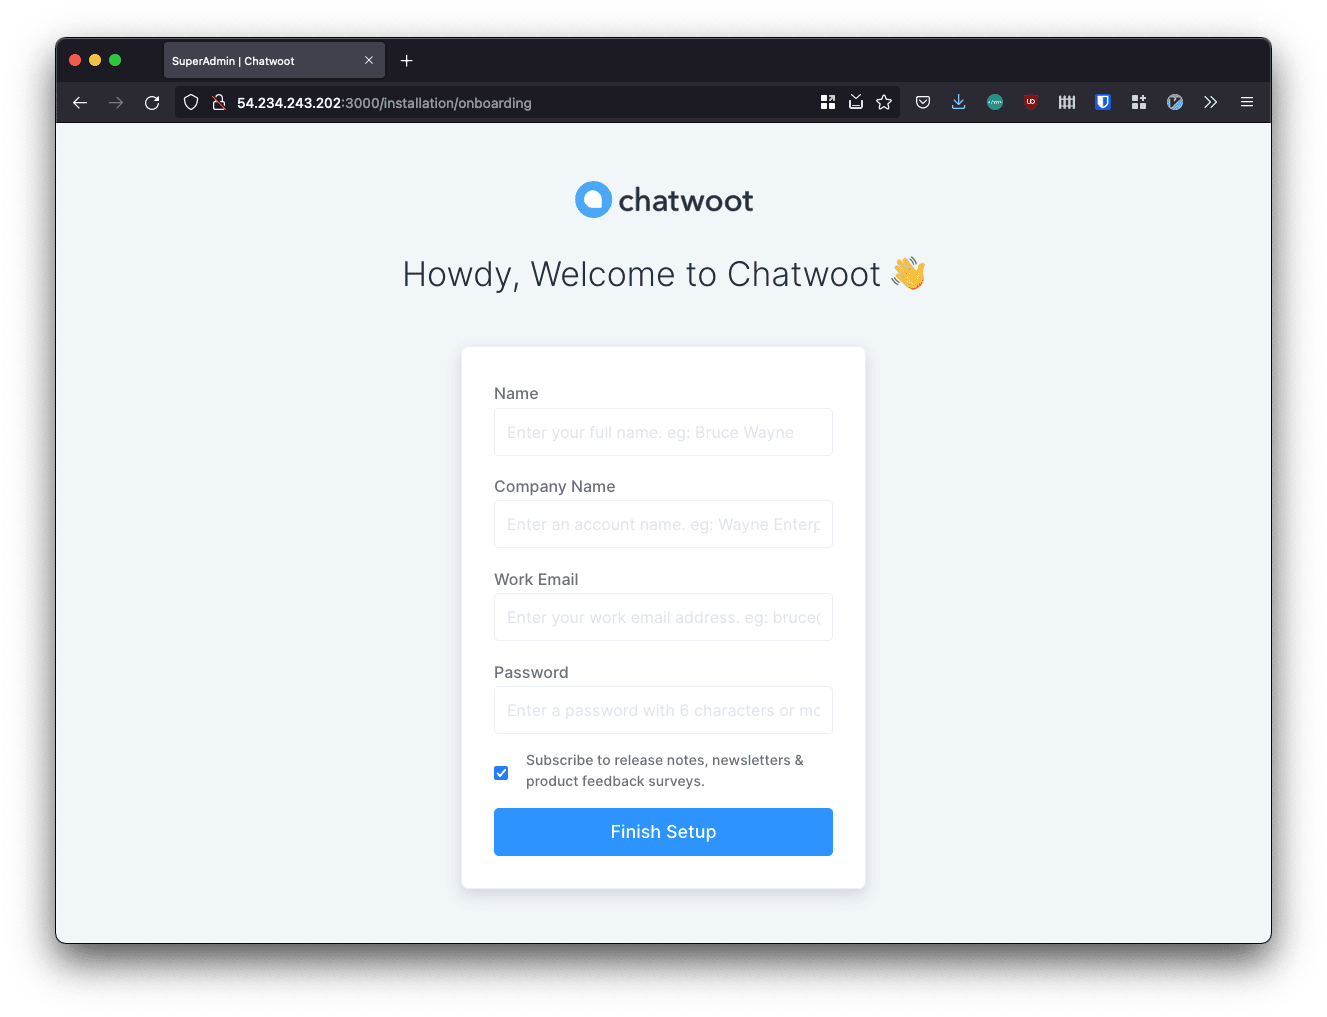
Configuring UniLink
To configure UniLink, we need to ssh into the instance. We will use AWS console connect for this.
Select the instance and click on
Connect.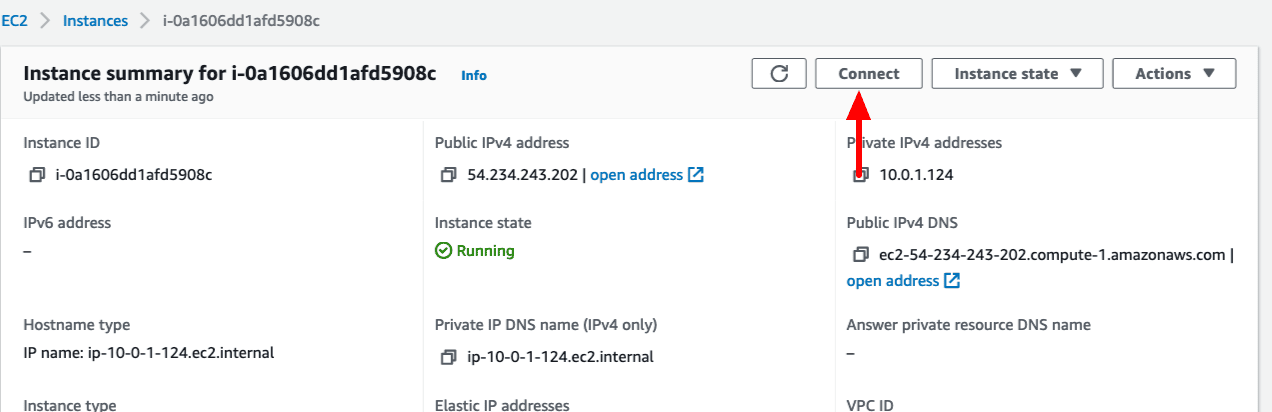
Change the username from
roottoubuntuand clickConnect.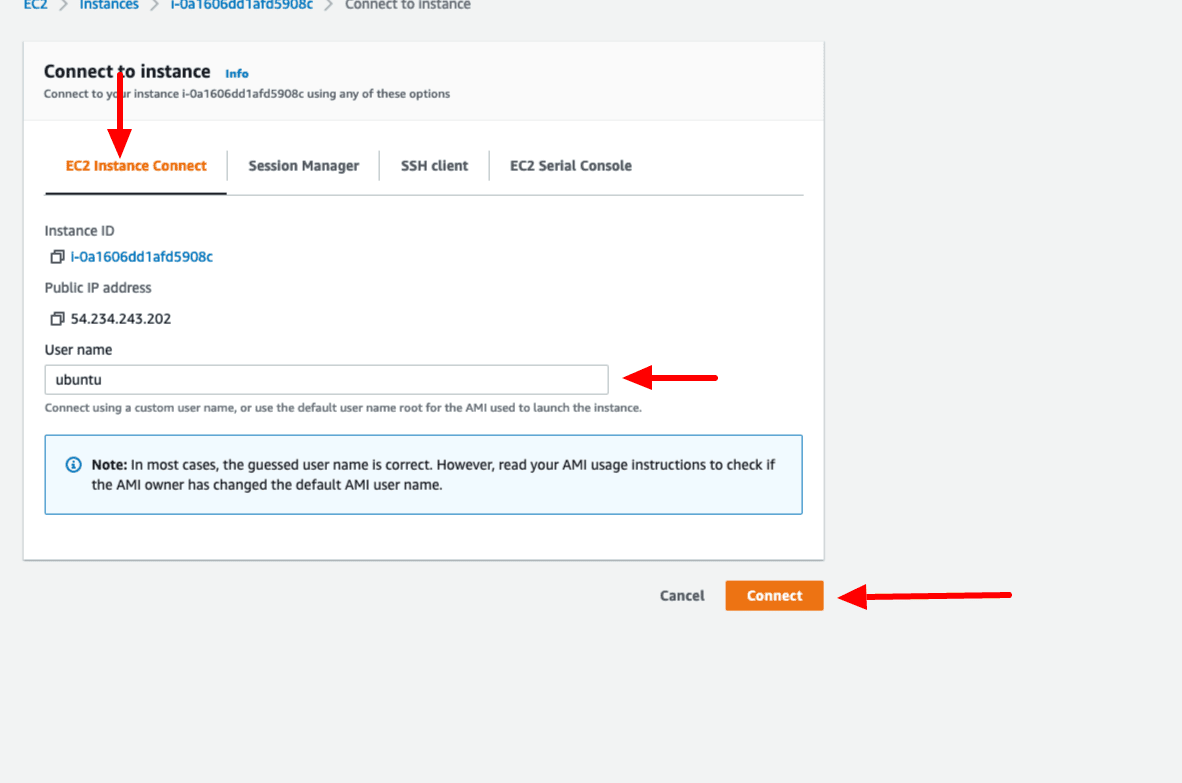
Switch to the
chatwootuser and configure the necessary environment variables. Refer Environment variables document for the complete list.
sudo -i -u chatwoot
cd chatwoot
vi .env
- Also, it is recommended to configure a proxy server like Nginx and set up SSL. Make sure to modify the security group created in
step 6accordingly.
Updating the instance
Please follow the UniLink update process in the standard Linux VM setup.