Setup Instance
If you follow the steps, you can deploy the Instance
Steps
Get your Unirsal Console credentials from our team.
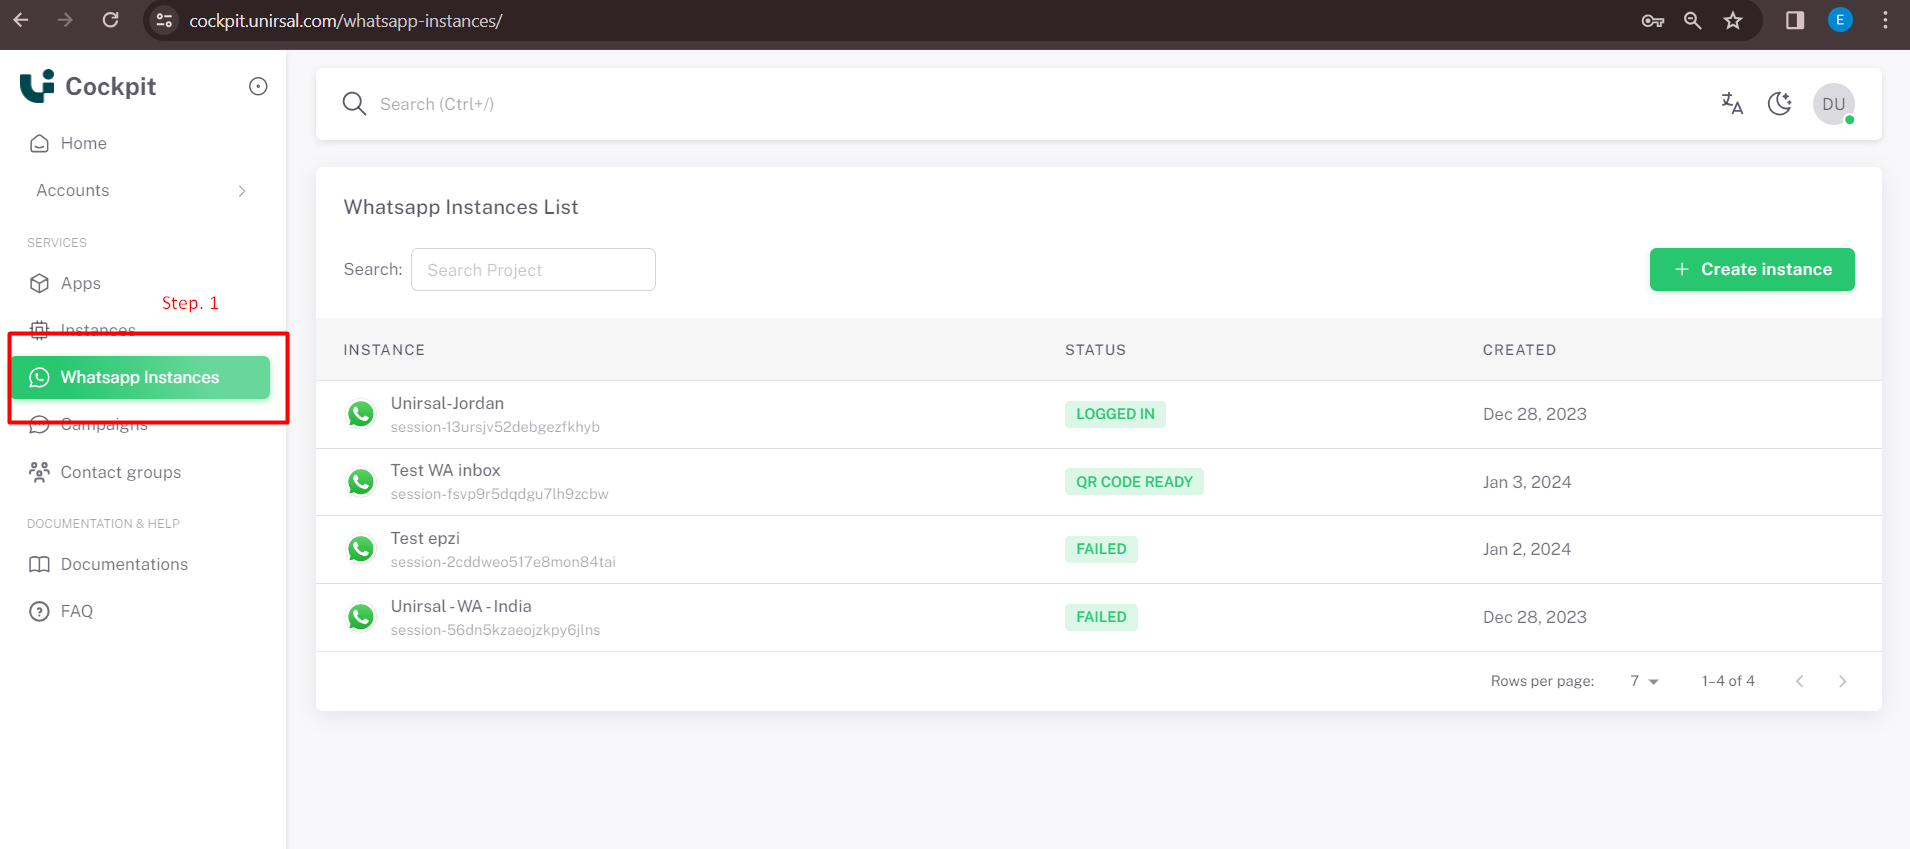
Step 1. Go to the whatsapp Instance page
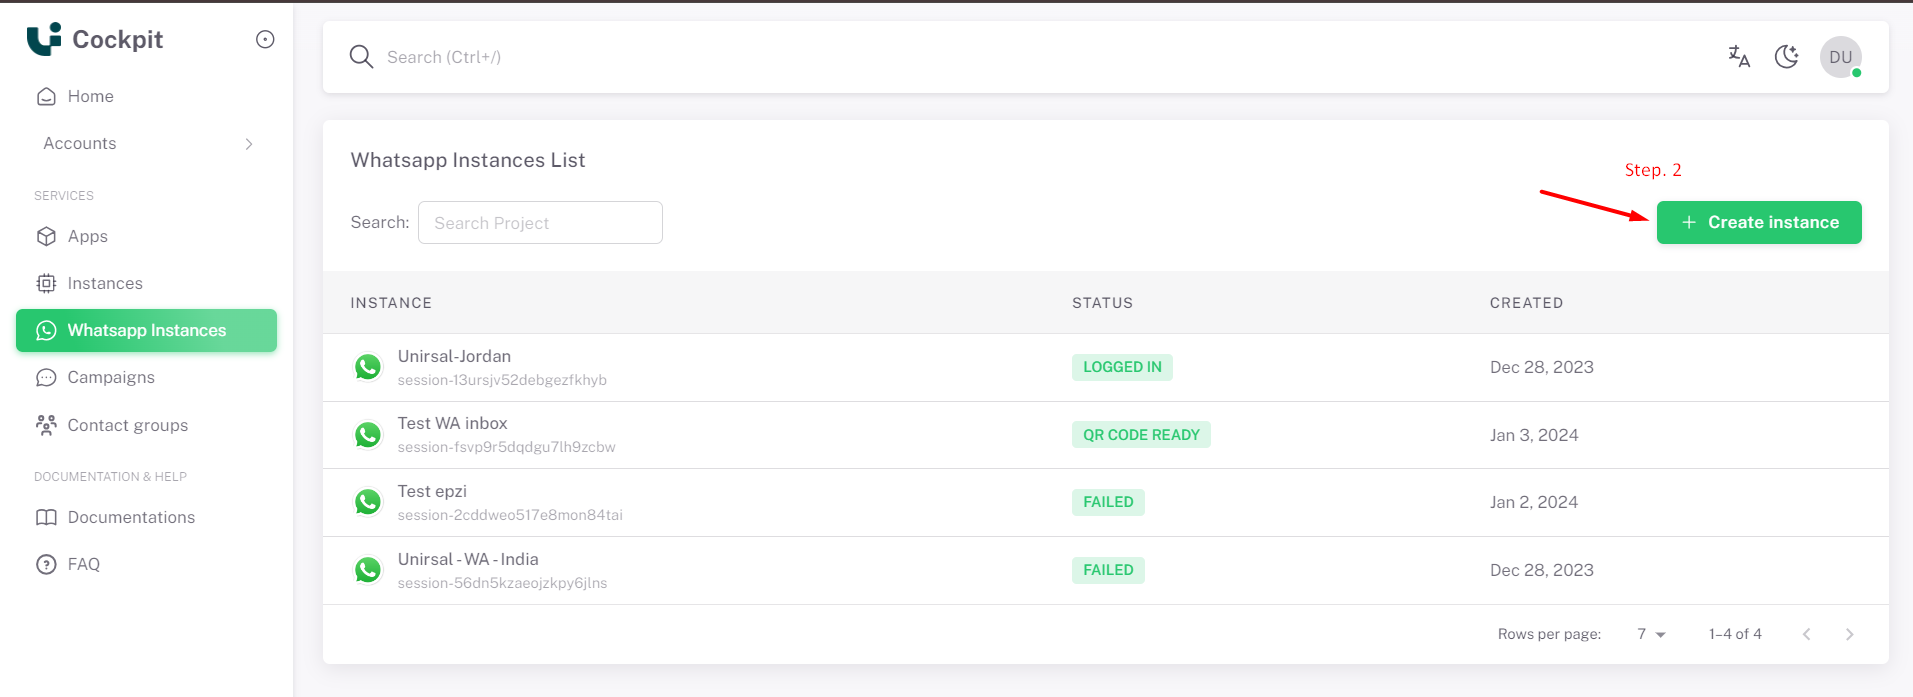
Step 2. Click on Create Instance
Step 3. Enter Instance name & Description
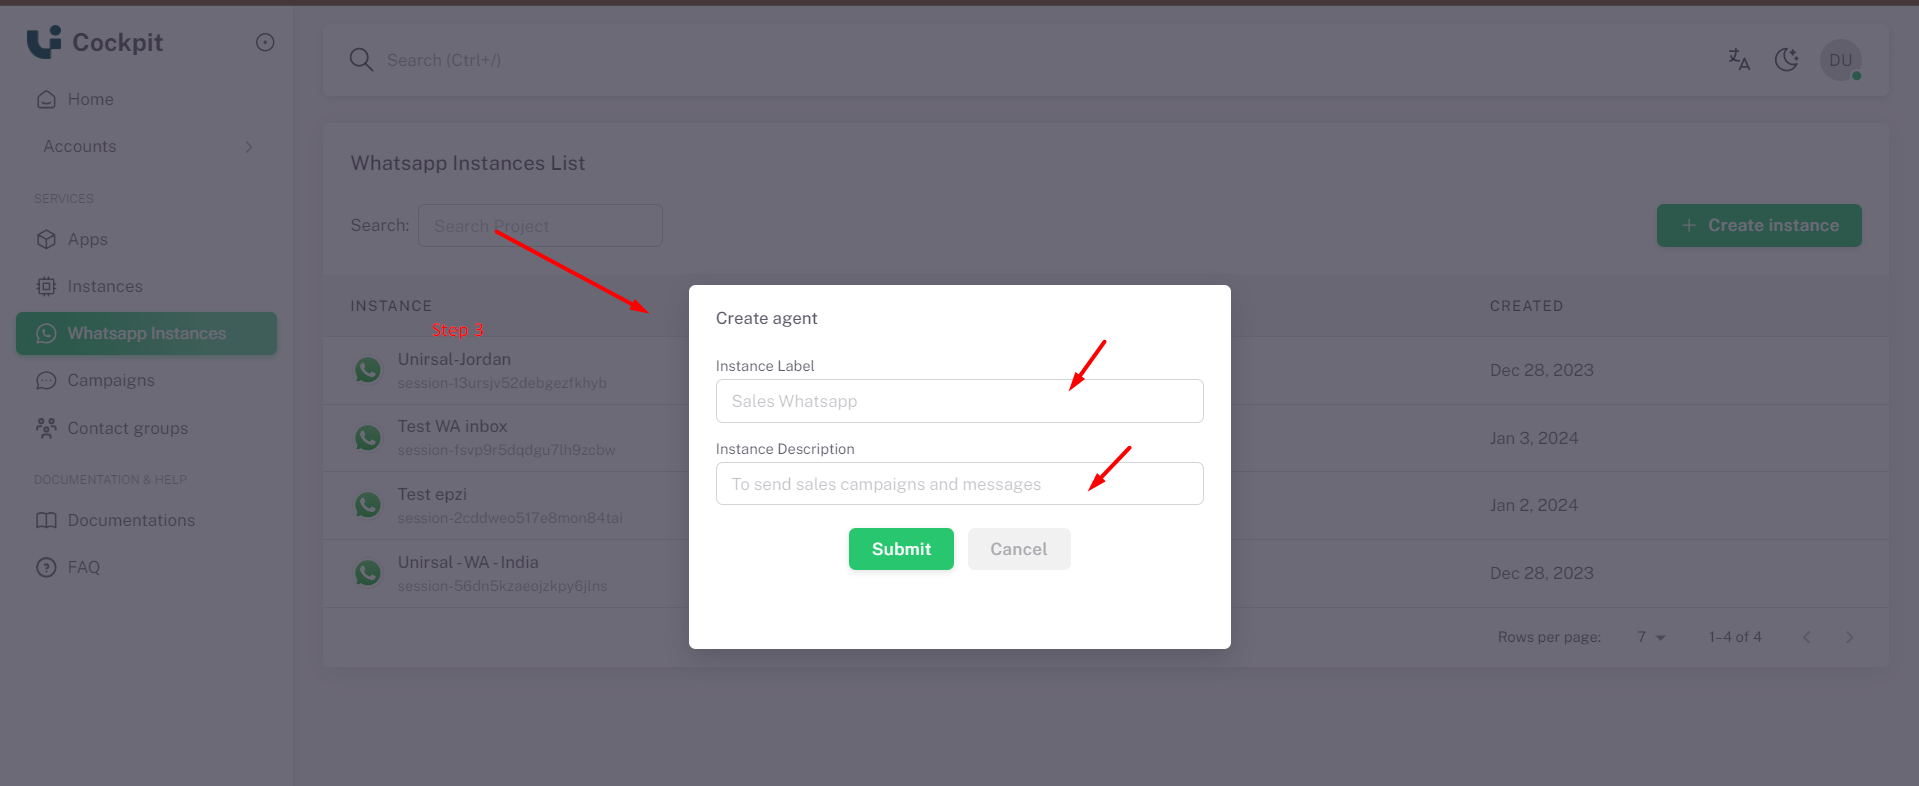
| Field Name | Description |
|---|---|
| Instance name | Enter your whatsapp name |
| Instance Description | Enter your whstapp description ex. To sent sales campaigns and messages |
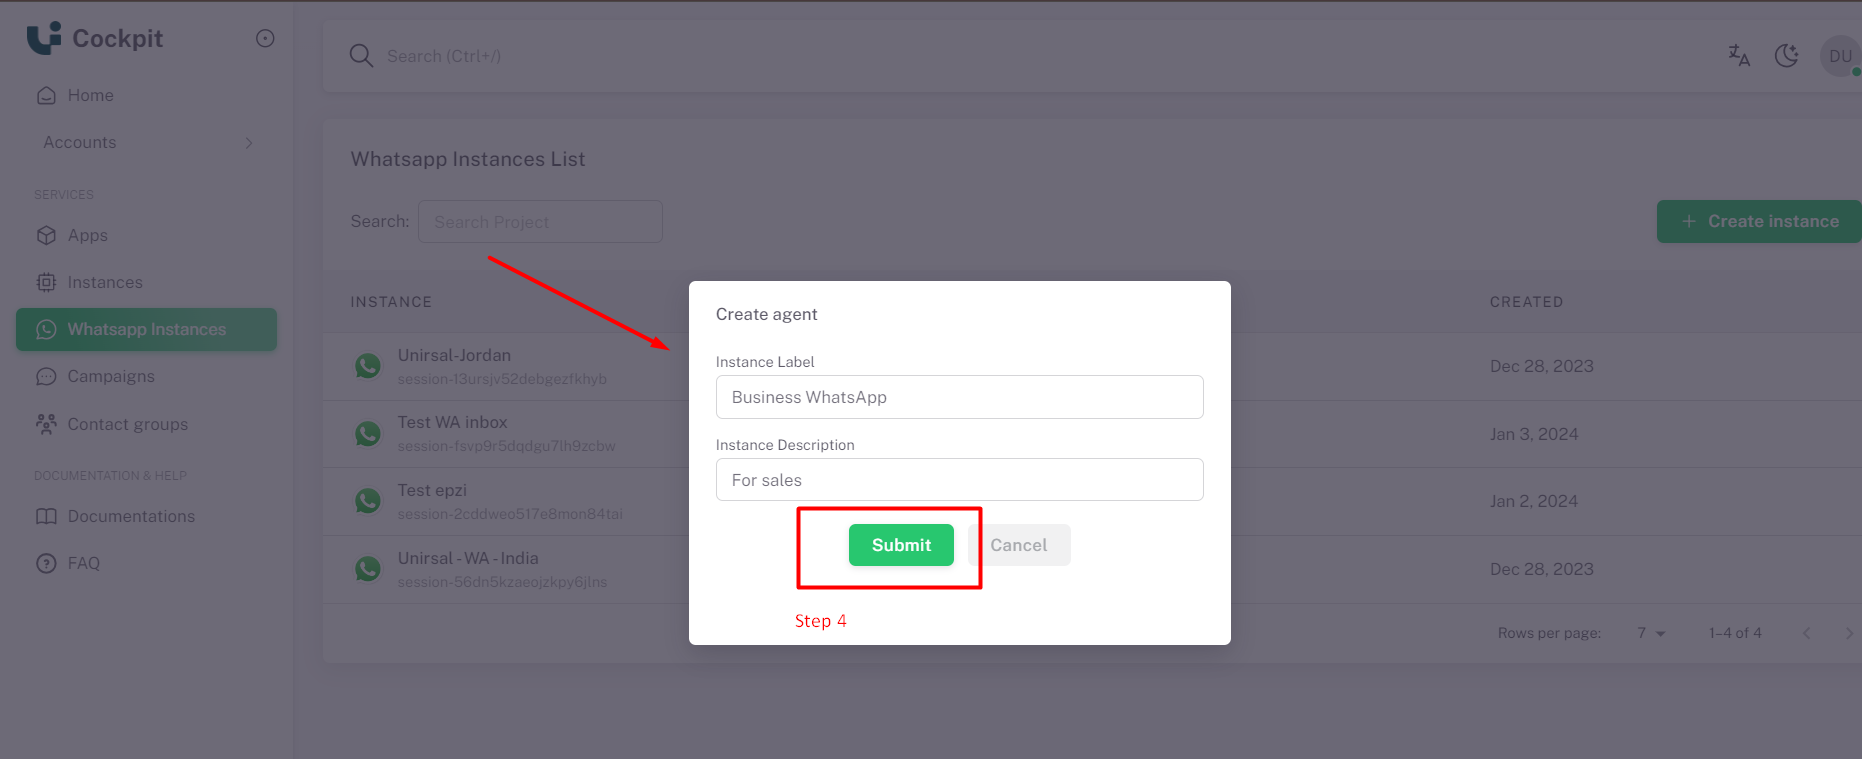
Step 4. Click on Submit from popup
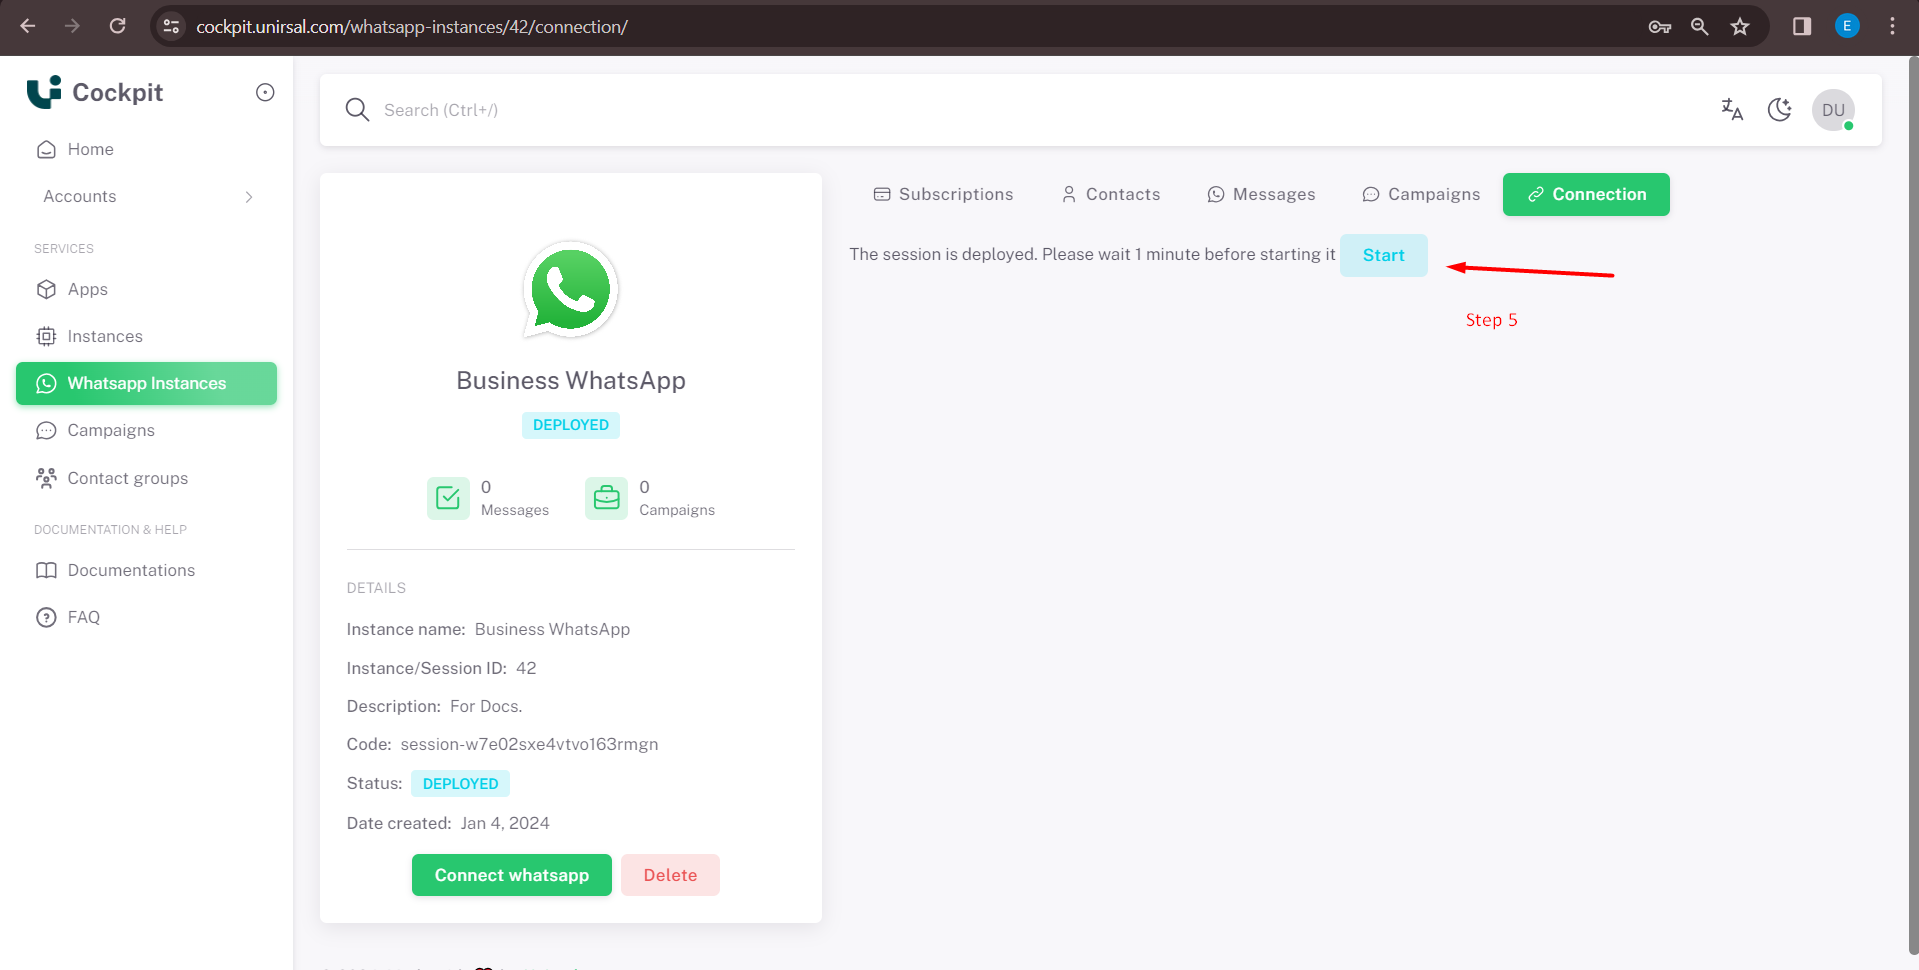
Step 5. Click on start
You can start the instance after one minute. Then the deployment is done.
Instance details
After successfully launch the Instance, you can see the details in the instance view page.
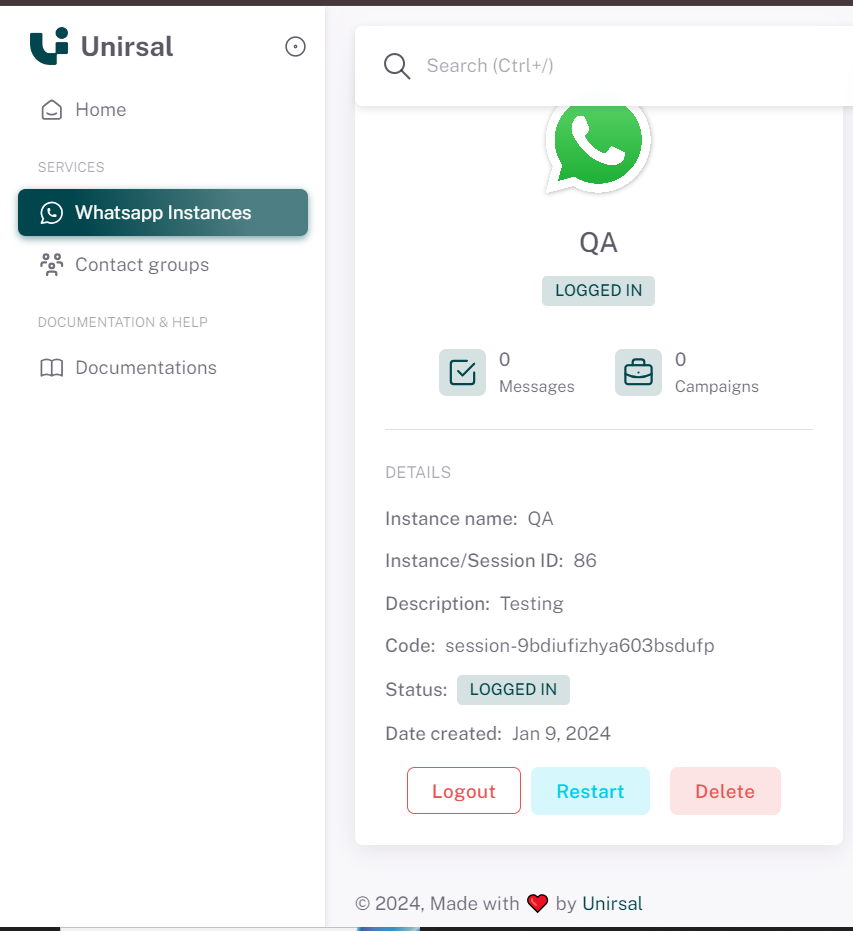
| Name | Description |
|---|---|
| Sync Profile | Sync whatsapp which will display and update the profile image, name and phone number |
| Restart button | restart button in case the session fails, or the pod fails |
| Logout button | When clicking on logout, the whatsapp connection will bw logout |
| Delete button | If we try to delete the instance, the instance will chaged to failed status |