Add Labels
Labels help you categorize conversations and prioritize them. You can assign a label to a conversation from the chat's side panel.
Labels are tied to the account and can be used to create custom workflows in your organization. You can assign custom colors to a label, which makes it easier to identify the label. You will be able to display the label on the sidebar to filter the conversations quickly.
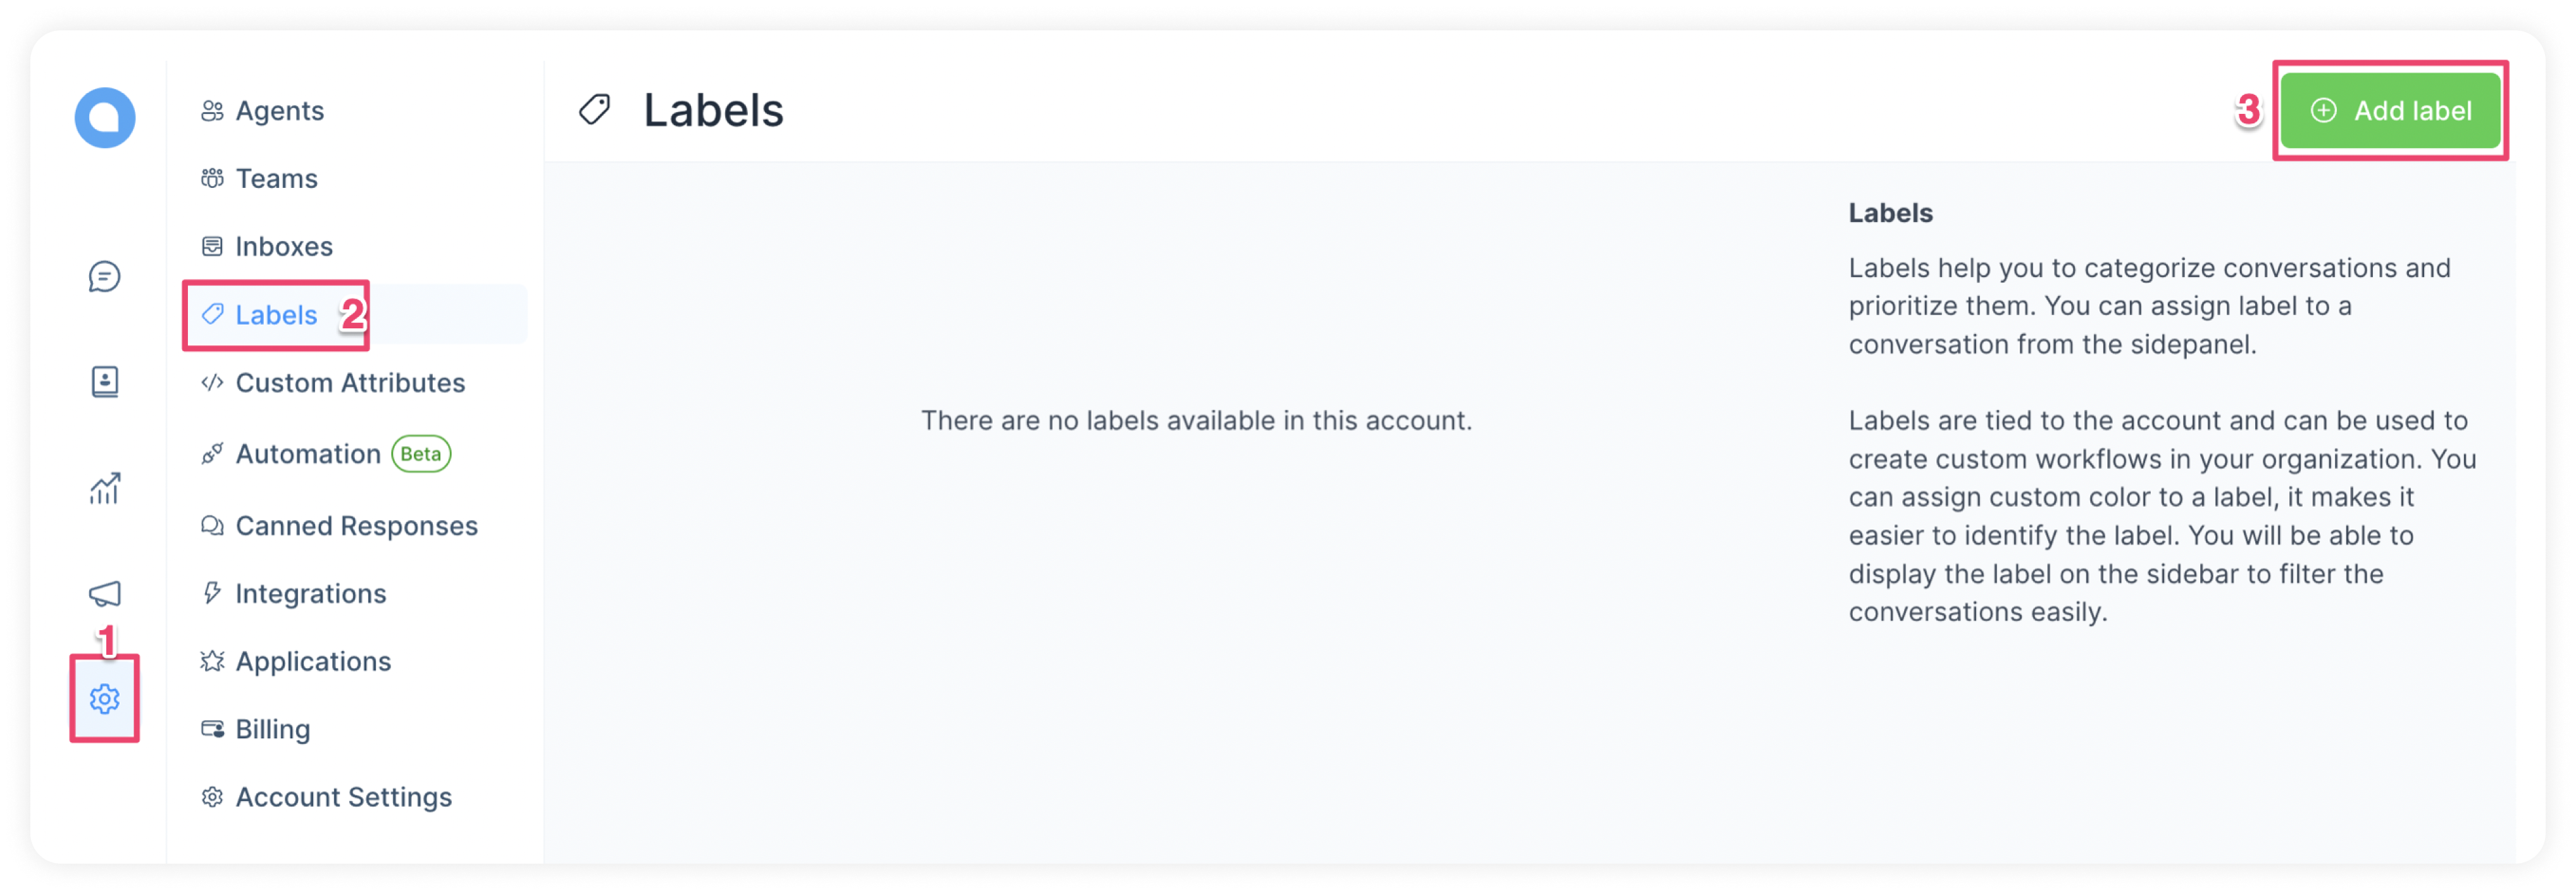
To add labels, click on Settings on UniLink home screen. Go to Labels → Add Label button.

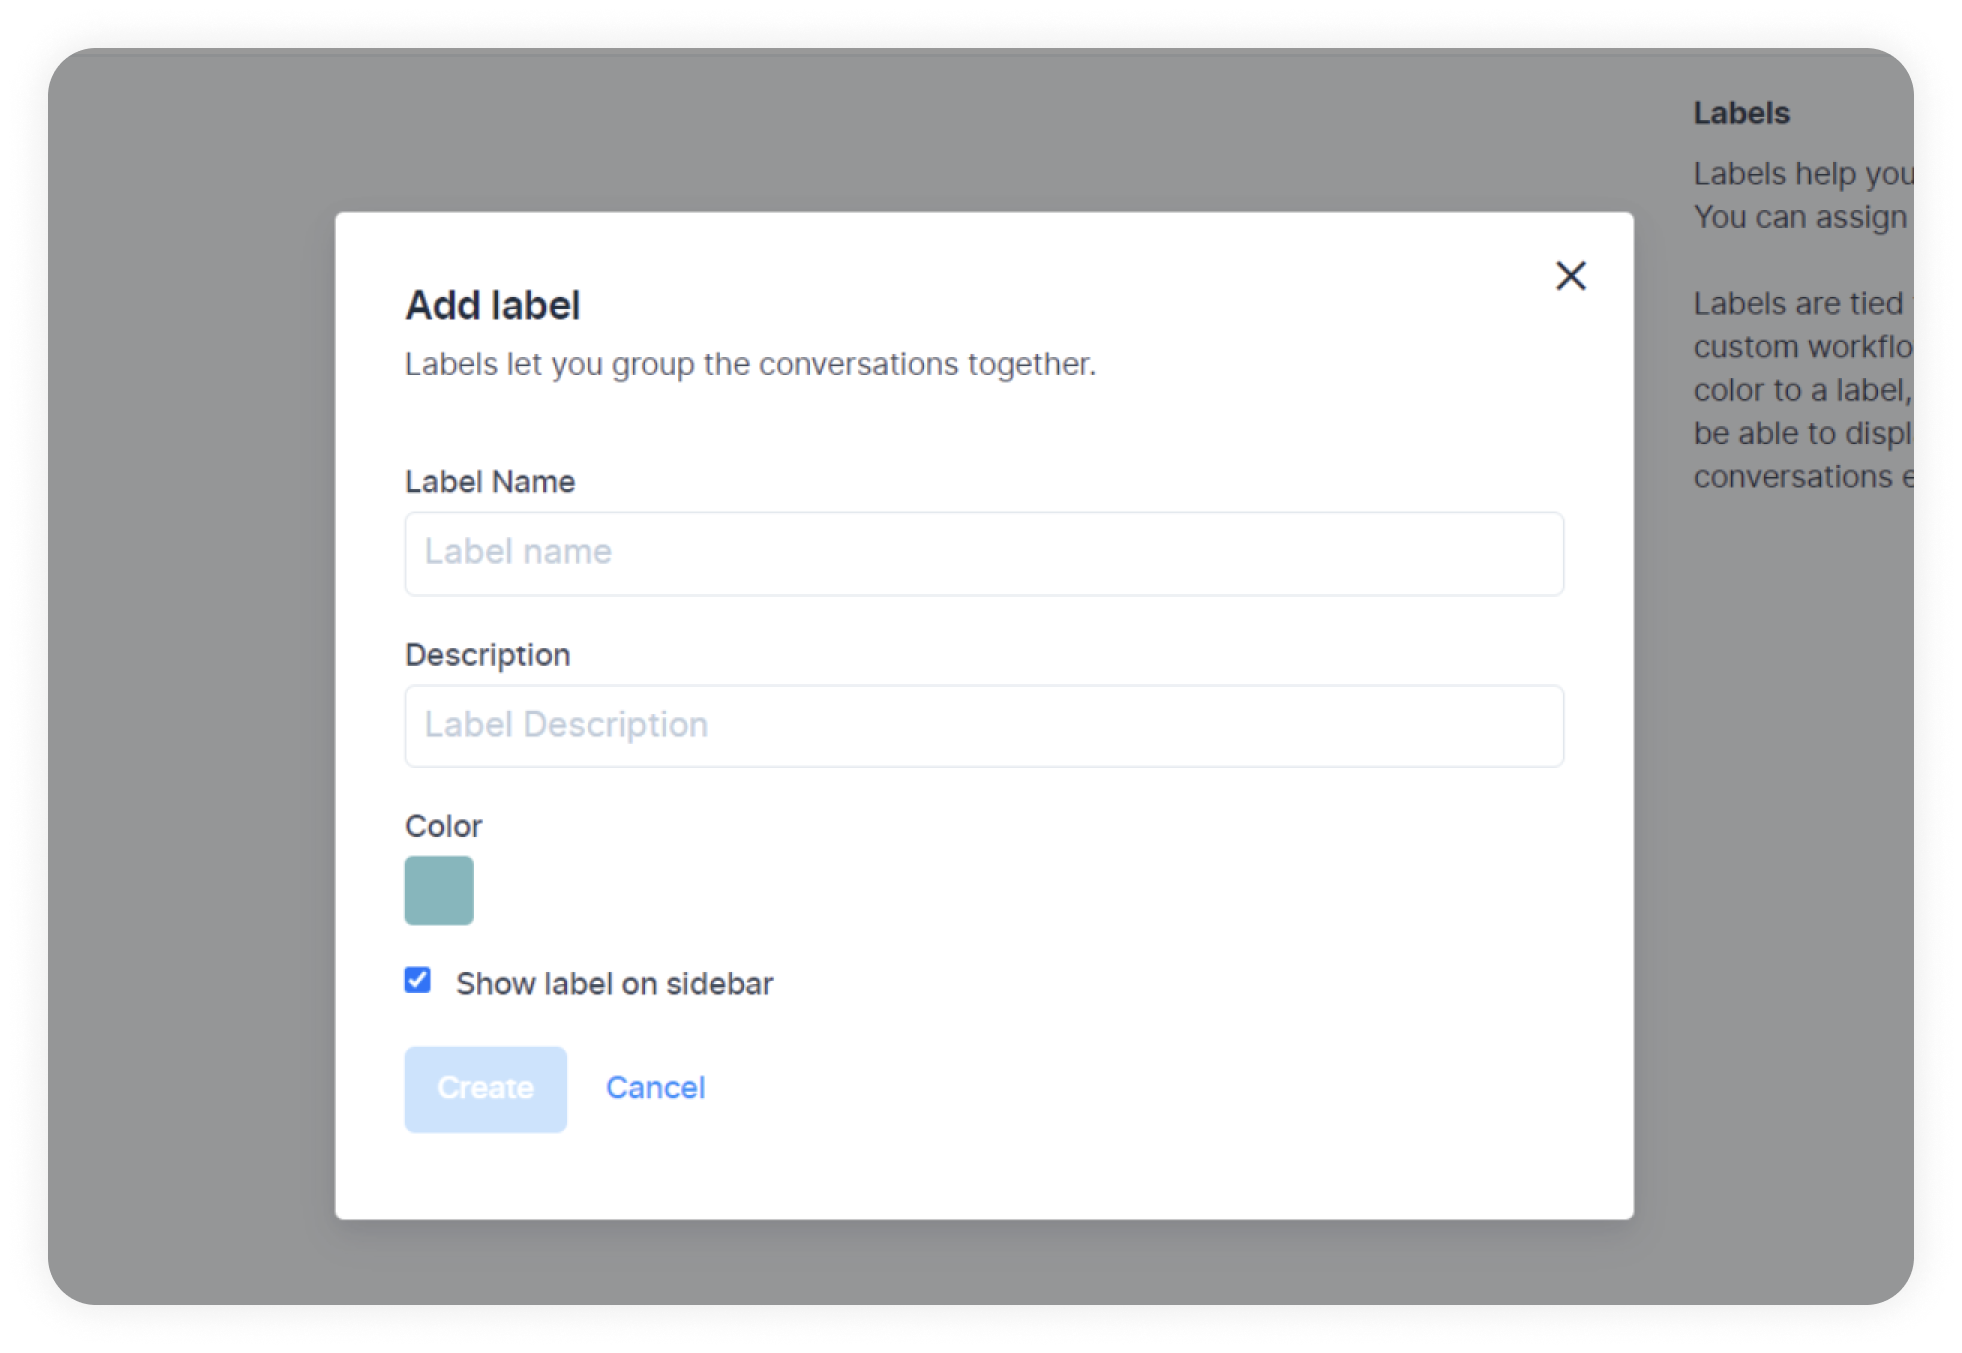
You will see the screen (like shown below) where you can design your own label.
As you add more labels, try to give them meaningful names as well as different colours to maintain distinction and clarity.

| Field Name | Value | Remarks |
|---|---|---|
| Label Name | Assign a Name for the label to identify the category | eg: Premium_Customer Only Alphabets, Numbers, Hyphen and Underscore are allowed |
| Description | Give a short description of what the label represents | eg: This Customer issue is to be resolved on priority |
| Colour | Select a colour for the label for easy identification | After Selection click on the small square again |
| Show Label on Sidebar | Select this option if you want the label to be displayed on the sidebar | This will help in easy identification of the conversations |
Click on Create. The Label added successfully message will be displayed.
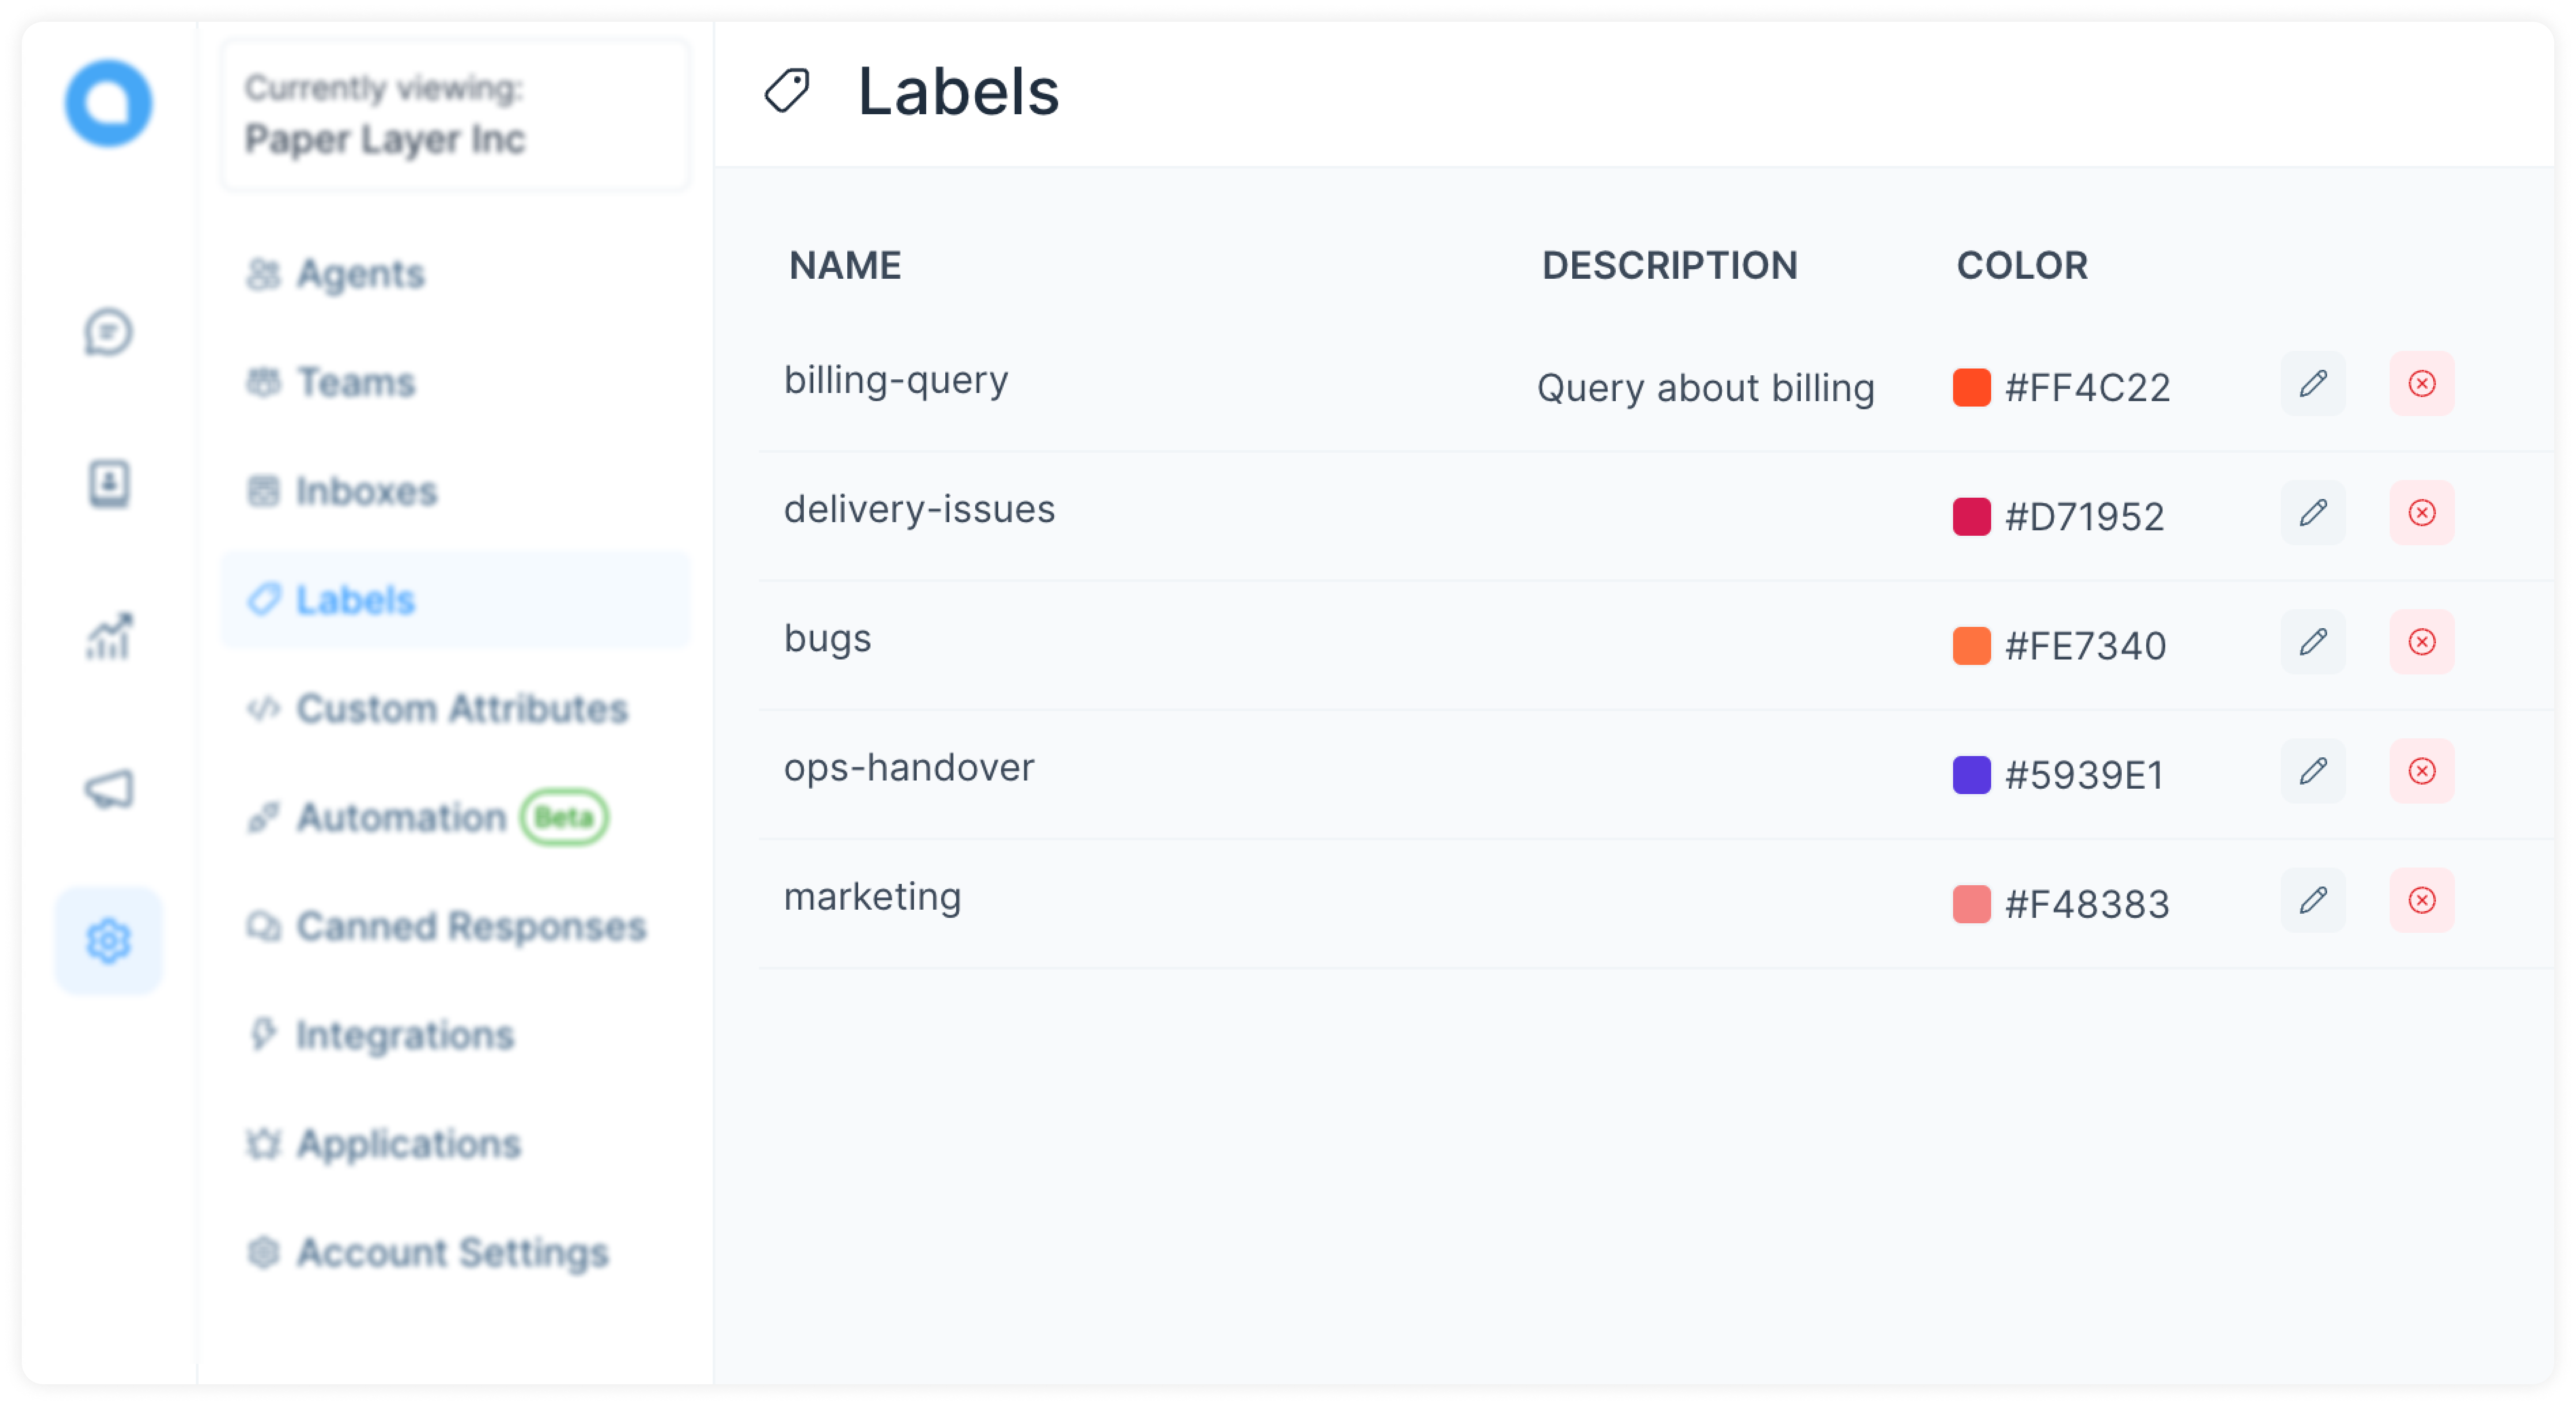
New Label has been created. You can create as many Labels as you need. Labels can be used across teams.

You can edit or delete the Label as per your need.